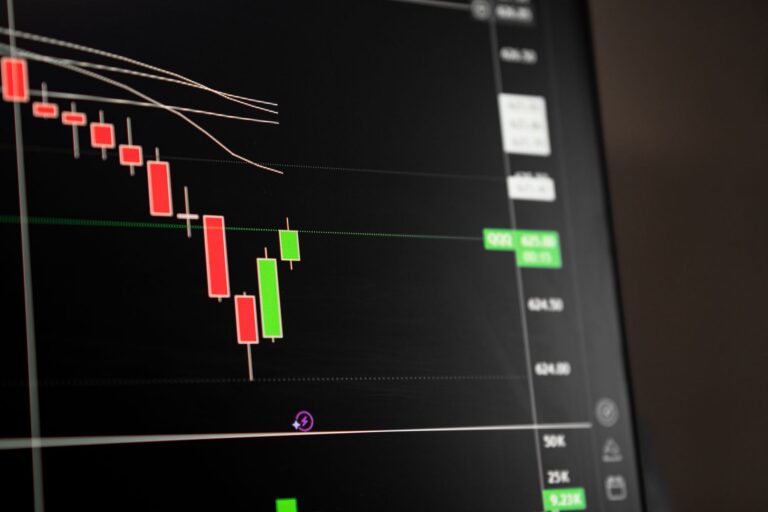

You keep marking zones, price taps them, and half the time the “perfect” area slices like it was never there. That is the real problem behind the question, what is an order block in trading. Most traders draw rectangles first and ask context questions later. In Smart Money Concepts, that order is backwards.
An order block in trading is the final bullish or bearish candle before a strong displacement that breaks structure or shifts order flow. In Smart Money Concepts, traders treat that candle range as a possible institutional origin zone where price may return for mitigation before continuing or failing.
Two useful numbers put the idea in context. In a typical live-market environment, one instrument can move cleanly while another chops, which is why structure matters more than the asset label. At the time of writing, WTI crude was around $83.44 in the example market feed, and FxStreet described WTI dipping below $84.00 during a dollar-driven move. The same sample feed showed the VIX around 14.43, a reminder that low headline volatility can still produce sharp intraday raids. Those numbers are examples only. The mechanic of an order block does not depend on today’s tape.
What Is an Order Block in Trading?
SMC Definition: The Final Opposing Candle Before Displacement
In Smart Money Concepts trading, an order block is the last candle moving against the future impulsive move. For a bullish setup, I look for the last down candle before a strong rally. For a bearish setup, I look for the last up candle before a hard selloff.
That candle is not special by itself. It becomes relevant because of what happens after it. Price leaves the area with aggression, takes out a meaningful swing, and shows that order flow has shifted. The candle becomes a reference point for where the larger move may have originated.
I’ve seen newer SMC traders mark every red candle before every green candle and call it demand. That creates a messy chart and a messier trade plan. The better question is simple: did that candle lead to displacement that changed the market’s behavior?
Why Structure Breaks Matter More Than Drawing Rectangles
A rectangle is just a visual tool. Market structure is the evidence.
A valid order block needs a reason to matter. That reason usually appears as a break of structure, a change of character, or a clear displacement leg that removes a prior high or low. Without that, the zone is only a historical candle with no proven control.
My opinion is firm here: most failed order block trading comes from ignoring structure. Traders see a neat candle, mark it, and enter on the first retest. That is backwards. The structure break tells you whether the market had enough force to make the candle meaningful.
How Order Blocks Represent Potential Institutional Origin Zones
The SMC idea is that large participants often cannot build or exit size at one exact price without affecting the market. A smart money order block is treated as a potential area where meaningful positioning occurred before price expanded away.
That does not mean a bank literally left a visible footprint inside one candle for retail traders to exploit. I avoid that kind of fantasy. The practical value is cleaner: the zone marks the origin of a move that caused a structural change. When price later returns, traders watch whether the market reacts, rebalances, or fails.
Order blocks are useful because they connect three things: price origin, market structure, and risk location. A level that cannot define risk is not much of a trading level.
How Do Bullish and Bearish Order Blocks Form?
Bullish Order Blocks: The Last Bearish Candle Before Upside Displacement
A bullish order block forms when price prints a bearish candle, then immediately or soon after launches higher with intent. The expansion should be obvious. You want to see strong-bodied candles, weak pullbacks, and ideally a break above a prior swing high.
The logic is straightforward. Sellers pushed price down into that final bearish candle. Then buyers overwhelmed them. The area becomes interesting because it may contain unfilled buying interest, trapped sellers, or an origin point that larger traders defend on a retest.
For example, imagine EUR/USD has been making lower highs during the London session. Price runs below an Asian session low, rejects, forms one last bearish candle, then rallies through the prior lower high with wide-bodied candles. That final down candle becomes a potential bullish order block, especially because the move began after a liquidity grab.
Bearish Order Blocks: The Last Bullish Candle Before Downside Displacement
A bearish order block is the mirror image. Price creates a final bullish candle, then sells off aggressively and breaks a significant low. That last up candle becomes a possible supply origin zone.
The best bearish versions often appear after price raids buy-side liquidity. A market pushes above a prior high, attracts breakout buyers, then snaps lower. Once price breaks structure to the downside, the last bullish candle before the drop becomes the area to study.
In crypto, this pattern can be violent. Bitcoin may sweep a weekend high, hold above it for a few candles, then collapse through an intraday higher low. The last bullish candle before that drop is not a short signal by itself, but it becomes a reference zone if price retraces. For broader context on crypto execution, see this guide on how to trade Bitcoin.
Why Impulsive Movement Confirms Intent
Order block SMC traders care about displacement because it separates real intent from random noise. A slow drift away from a candle does not say much. A sharp expansion that breaks a level says more.
Displacement often appears with long bodies, little overlap, and fast travel through nearby price. It may also leave behind an imbalance, commonly called a fair value gap. That imbalance shows one-sided delivery, where price moved so quickly that normal two-way trading was thin.
A strong impulse does not promise continuation. Nothing does. It does, however, provide evidence that the market repriced from that area. That is the foundation of the setup.
What Makes an Order Block Valid in SMC?
Clear Displacement Plus Break of Structure or Change of Character
A valid order block begins with displacement and structural evidence. The move away from the candle should break something meaningful. That might be a major swing on the higher timeframe or a smaller change of character on an entry timeframe.
Here is the distinction I use. A break of structure continues the dominant trend by removing a previous swing in that trend direction. A change of character suggests the prior order flow may be shifting. Both can support an order block, but the higher-timeframe context decides which one matters more.
A candle before a tiny bounce inside a larger range is usually weak. A candle before a clean expansion through a defended swing is more useful.
Unmitigated Price Area Near Logical Liquidity
Mitigation means price returns to an area where prior orders may be rebalanced, reduced, or defended. An unmitigated order block has not yet been revisited after the impulsive move. I prefer fresh zones because they have cleaner information.
Location matters. A bullish block below equal lows, after a stop-run, often carries better context than a bullish block floating in the middle of nowhere. A bearish block above equal highs after a buy-side raid can be cleaner than one buried inside random chop.
Liquidity is the fuel. Order blocks are the origin reference. For a deeper breakdown of stop-runs and raids, read this guide to liquidity sweeps in trading.
Added Confluence From Imbalance or Fair Value Gap
An imbalance near the block can improve the case. A fair value gap shows fast movement where price delivered inefficiently. When a block and imbalance overlap, traders often watch the combined area for reaction.
I do not treat confluence as decoration. More lines do not make a bad setup better. The best confluence answers a practical question: does this zone sit at the origin of a meaningful move, near liquidity, with a clear invalidation point?
For example, a bearish order block that forms after a high is swept, then leaves a downside gap and breaks a swing low, has multiple pieces of evidence. The gap alone is not the trade. The block alone is not the trade. The combined story is what matters.
How Do You Identify Order Blocks Step by Step?
Step 1: Establish Higher-Timeframe Bias and Market Structure
Start from the higher timeframe. Daily, 4-hour, and 1-hour charts often define the larger intent for intraday traders. Swing traders may work from weekly and daily charts. The exact timeframe is less important than consistency.
Mark the major swing highs and lows. Decide whether price is expanding upward, distributing sideways, or repricing lower. Then identify where liquidity likely rests. Equal highs, equal lows, previous session highs, weekly opens, and obvious swing points often attract stops.
The order block should make sense inside that map. A 5-minute bullish block fighting a clean daily bearish leg deserves suspicion. A lower-timeframe bullish block inside a higher-timeframe discount zone after sell-side liquidity has been taken is more interesting.
Step 2: Mark the Impulse Leg and Locate the Last Opposing Candle
Find the move that changed behavior. Look for a clear expansion away from a price area, then identify the last candle that moved opposite the expansion.
- Bullish setup: locate the last bearish candle before price expanded higher and broke a relevant high.
- Bearish setup: locate the last bullish candle before price expanded lower and broke a relevant low.
- Range context: be stricter, because range candles often produce false blocks without follow-through.
After marking the candle, ask whether price has already returned to it. A heavily retested zone can still react, but it often loses quality. Fresh areas tend to provide cleaner readouts.
Step 3: Refine the Zone Using Body, Wick, or Lower-Timeframe Structure
There are several ways to draw the zone. Some traders use the full candle, including wicks. Others use the candle body. Some refine the area by dropping to a lower timeframe and finding the smaller block that created the same move.
Full-candle marking gives more room and fewer missed taps, but risk can become wide. Body-only marking improves reward-to-risk math, but price can wick through before reacting. Lower-timeframe refinement can help, but it also tempts traders to over-optimize.
My approach is practical. On higher timeframes, I mark the full range first. Then I look inside it for a more precise lower-timeframe displacement point. The final entry plan must still respect the higher-timeframe invalidation.
Order Block vs Support and Resistance: Key Differences
Support and Resistance Are Broad Reaction Areas
Traditional support and resistance zones are areas where price has reacted before. They are useful, especially when aligned with market structure, volume, and liquidity. The problem is that many traders mark them too broadly and treat every touch as equal.
Support and resistance often describe the result. Price bounced here. Price rejected there. That can be enough for some methods, but SMC asks a more specific question: what caused the move away?
Market commentary often focuses on broad levels because they are easy for large audiences to follow. A CNBC market update dated Aug. 24, 2026, for example, is built around major index movement and headline levels. That type of information is useful for context, but it does not identify the candle-level origin of order flow.
Order Blocks Are Specific Displacement-Origin Candles
The key difference in the order block vs support resistance debate is specificity. Support and resistance might cover a wide band. An order block points to a particular candle or tight candle cluster that preceded a structural move.
A smart money order block also has a cleaner failure point. For a bullish block, a decisive close below the zone often signals that the area failed. For a bearish block, a decisive close above the zone can invalidate the idea. Traditional zones can be blurrier, which leads many traders to keep adjusting the level after the fact.
That clarity is valuable. It forces the trader to define the trade before the trade defines the trader.
Why a Single Reaction Does Not Make a Smart Money Order Block Valid
A single bounce is not enough. Price can react from almost anywhere for a few candles. Liquidity algorithms, short covering, news repricing, and normal mean reversion can all create temporary reactions.
A valid block should have a story behind it. Where was liquidity taken? Which structure broke? Was the move away impulsive? Has price returned yet? Is the zone aligned with a higher-timeframe objective?
That last question is where many traders get caught. They label a candle as an order block because price bounced from it once. Then they ignore the fact that the larger trend is aiming directly through the zone. Context beats decoration.
How Should an Order Block Trading Plan Work?
Wait for Mitigation and Confirmation Before Entry
A clean plan starts before price returns to the zone. Define the block, the expected reaction, the invalidation level, and the likely target. Do that while calm.
When price mitigates the zone, confirmation can take several forms. Some traders wait for a lower-timeframe change of character. Others want a sweep inside the zone, then a reclaim. Some require displacement away from the area before entering on a retracement.
I prefer confirmation over blind limit orders in most conditions. Limit entries can work, but they offer no proof that the zone is being defended. Confirmation costs some entry quality, yet it can filter many weak retests.
Use Lower-Timeframe Shifts to Improve Entry Precision
Lower timeframes are useful after the higher-timeframe zone is already chosen. A trader watching a 4-hour bullish block might drop to the 15-minute or 5-minute chart and wait for sellers to fail inside the area.
A common entry sequence looks like this:
- Price trades into the higher-timeframe block.
- It sweeps a local low or taps an imbalance.
- Lower-timeframe candles shift upward and break a minor high.
- The trader enters on a pullback, with risk below the invalidation point.
This process keeps the trade anchored to the larger idea while using smaller structure for timing. Without the higher-timeframe anchor, lower-timeframe order blocks can become noise. Fast charts produce endless candles that look meaningful until they are tested.
Place Stops Beyond Invalidation and Target Opposing Liquidity
Stops belong beyond the point where the trade idea is wrong. For a bullish setup, that usually means below the order block low or below the swing that supported the block. For a bearish setup, it usually means above the block high or the relevant swing.
Targets should be based on opposing liquidity, not hope. Bullish trades often aim for prior highs, equal highs, unfilled imbalances, or premium areas in the range. Bearish trades often aim for prior lows, equal lows, gaps below price, or discount areas.
Risk has to be defined in advance. A beautiful block with a stop that is too wide for your account is not a trade. It is a chart observation. Position size should adjust to invalidation, never the other way around.
Timeframes, Mitigation, and Invalidation Rules
Higher-Timeframe Order Blocks Carry More Weight
Higher-timeframe blocks usually matter more because they represent larger market decisions. A weekly or daily block can guide bias for days or weeks. A 5-minute block may matter for one session and then become irrelevant.
That said, higher timeframe does not mean automatic respect. Price can blow through a daily zone during a strong repricing event. Macro catalysts, earnings, central bank decisions, and liquidity shocks can all override a technical area.
Evergreen trading work requires humility. Barron’s live stock market coverage dated Aug. 28, 2026 is a simple reminder that markets are constantly repricing around new information. Your framework should help you react, not pretend the chart is immune to news.
Lower-Timeframe Order Blocks Help Refine Entries
Lower-timeframe blocks are best used as entry tools inside larger zones. They can help reduce stop size, identify confirmation, and provide cleaner execution. They are weakest when traded in isolation.
For example, a 1-hour bearish block may sit inside a daily premium area after buy-side liquidity was taken. Price returns to that 1-hour zone, then the 5-minute chart forms its own bearish block after a minor structure break. That lower-timeframe block can become the execution model.
The lower timeframe should support the higher timeframe. When the two disagree, I usually stand aside or reduce the idea to observation. There will always be another setup.
Bullish and Bearish Order Block Failure Conditions
Failure is the part traders skip, and it is the part that keeps the method honest.
A bullish order block weakens when price trades deeply through it without reaction. It fails more clearly when price closes below the zone and continues lower, especially with displacement. That tells you buyers did not defend the origin area.
A bearish block weakens when price pushes through the upper boundary, absorbs selling, and holds above it. It fails when price closes decisively above the zone and starts using it as support. At that point, the short idea is no longer valid.
There is also soft failure. Price taps the block, gives a tiny reaction, then stalls. No displacement away. No lower-timeframe shift. No liquidity objective reached. That is often a warning that the area is being consumed rather than defended.
A failed order block can become useful information. A bullish block that fails may point to lower liquidity. A bearish block that fails may signal strength and a run toward higher stops. Failure is not just a loss event. It is market information, provided you accept it quickly.
FAQ
What is an order block in trading?
An order block in trading is the final bullish or bearish candle before an impulsive displacement that breaks market structure or creates a clear shift in order flow. In SMC, it is treated as a potential origin zone for institutional activity, not a random historical reaction level.
How do you identify order blocks?
Start with higher-timeframe bias, then find an impulse leg that caused a break of structure or change of character. Locate the last opposing candle before that move, mark its relevant body or wick range, and confirm it sits near liquidity with an unmitigated area or imbalance nearby.
What is the difference between an order block and support or resistance?
Support and resistance are broad zones where price has reacted before. An order block is more specific: it is tied to the candle that preceded displacement and a structure break. A valid order block should reflect order-flow context, liquidity, and risk, rather than repeated touches alone.
When is an order block invalidated?
A bullish order block weakens or fails when price closes decisively below the zone, showing buyers did not defend the origin area. A bearish order block weakens or fails when price closes decisively above it. Traders should define this invalidation point before entering any setup.
Which timeframe is best for order block trading?
Order blocks can form on any timeframe, but higher-timeframe zones usually carry more weight because they reflect larger order-flow decisions. Lower-timeframe order blocks are useful for entry refinement, confirmation, and tighter risk, especially when they align with the higher-timeframe bias and liquidity objective.
The real skill is not finding more blocks. It is filtering them. Start with structure, demand displacement, respect invalidation, and treat every retest as a question the market still has to answer. What part of order block trading gives you the most trouble: identifying the zone, waiting for confirmation, or cutting the failed idea?
Disclaimer: This content is for educational purposes only and is not financial advice, investment advice, or a recommendation to buy or sell any market.