You mark a level, price taps it, and then it either launches without you or slices straight through your stop. That frustration is why traders ask what is an order block in trading in the first place. The concept sounds precise, but most people draw it too loosely.
Direct answer: An order block in trading is the final opposing candle or compact price range before a strong institutional-style move that breaks market structure. In Smart Money Concepts, the zone matters because it marks the likely origin of aggressive buying or selling, imbalance, and future mitigation.
I treat an order block as a location, not a signal. That distinction matters. A clean zone can give you context for a trade, but entry still depends on structure, liquidity, timing, and risk. The moment a trader starts buying every bullish-looking candle or selling every bearish-looking candle, the edge disappears.
Most market commentary focuses on headline moves. For example, one Sunday Guardian Live market update cited the Dow down 0.10%, Nasdaq down 1.32%, and S&P 500 down 0.59% in the same session. Another S&P 500 live report referenced Walmart falling 9% while the index had gained 10.2% in the first half of the year. Those numbers are useful background, but an order block trader is asking a different question: where did the aggressive repricing begin, and will price return there before continuing?
What Is an Order Block in Trading?
The practical definition
An order block is usually the last candle moving against the future direction of the move before price expands aggressively and breaks structure. In a bullish setup, it is often the final down candle before a sharp rally. In a bearish setup, it is often the final up candle before a sharp decline.
That simple definition is useful, but incomplete. The candle alone is not magic. The context around it is what matters. A proper smart money order block should sit at the origin of a meaningful move, ideally one that leaves imbalance, attacks liquidity, and changes the behavior of price.
In Smart Money Concepts trading, the idea is that large participants cannot always enter or exit at one perfect price. Their activity often leaves clues: a liquidity grab, a fast expansion away from a level, a break in structure, and later a return to rebalance or mitigate the zone. That return is where traders look for opportunity.
Why the origin of imbalance matters
Plenty of candles appear before strong moves. Most are irrelevant. A valid order block should be connected to a price imbalance, meaning the market moved away so quickly that little two-sided trading occurred inside part of the range.
That imbalance tells me buyers or sellers were not casually participating. They were pressing. Price did not grind away from the level with overlapping candles. It left with force. In liquid markets like major forex pairs, index futures, and large crypto assets, that expansion is one of the first signs that a zone deserves attention.
My opinion is blunt: traders overdraw order blocks because they want more trades. The best zones are usually obvious after the fact, but selective before entry. That selectivity is the skill.
Key terms you need before using the concept
Displacement means price moves away from a zone with strong directional candles, range expansion, and little hesitation. It shows urgency.
Break of structure means price takes out a prior swing high in an up move or a prior swing low in a down move. It confirms that market structure has shifted or continued.
Change of character, often shortened to CHoCH, is an early structure shift after one side fails to maintain control. Traders often use it when price transitions from bearish to bullish behavior, or the reverse.
Mitigation is the later return into the zone where unfilled or defended orders may remain. The market comes back, trades into the block, and either respects it or invalidates it.
Liquidity refers to pools of orders, often above equal highs, below equal lows, around session extremes, or near obvious support and resistance. For a deeper breakdown, read the guide on liquidity sweeps and stop runs.
How Do Bullish and Bearish Order Blocks Form?
Bullish order blocks
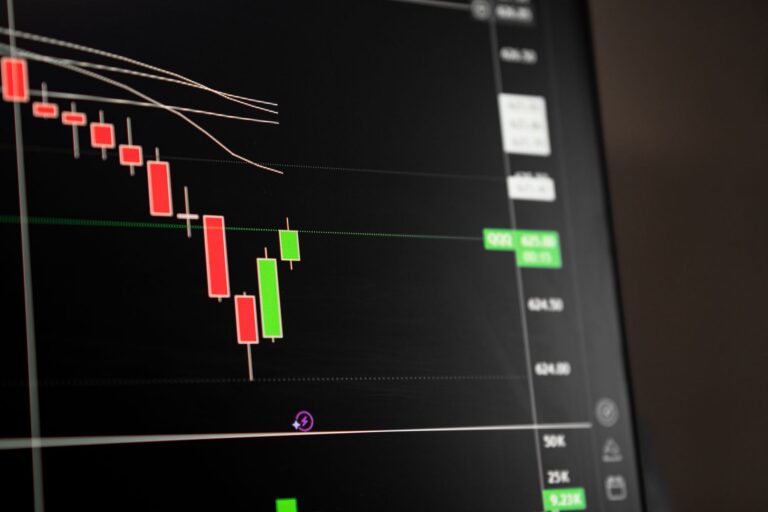
A bullish order block forms when price creates a final bearish candle or small bearish range, then launches higher with conviction. The move should do more than bounce. It should break a prior swing high, recapture a lost level, or shift the short-term structure from lower lows into higher highs.
Picture a market drifting lower into an old low. Sellers become confident. Stops sit below the low. Price dips through it, draws in breakout sellers, then snaps back upward. The last down candle before the sharp rally becomes the bullish block candidate. The later retest of that candle is the area where traders watch for a possible long setup.
The cleanest bullish versions often form after a sell-side liquidity raid. Price runs below an obvious low, rejects, then expands upward. That sequence tells a stronger story than a random green candle in the middle of a range.
Bearish order blocks
A bearish order block is the mirror image. Price prints a final bullish candle or bullish range before an aggressive move lower. The selloff should break a prior swing low, reject a premium area, or create a visible shift in control.
A typical bearish scenario starts with price pushing above equal highs or a prior session high. Buyers chase the breakout. Stops from short sellers get triggered. Then price reverses sharply and drives lower. The final up candle before the selloff becomes the bearish block candidate.
Again, context matters. A bearish candle after a tiny pullback is ordinary price action. A bearish block after a liquidity raid and structural breakdown is different. That is where order block SMC thinking separates itself from basic candle labeling.
The impulse has to mean something
The impulse away from the zone should be visible without squinting. I want to see speed, clean candle bodies, expanded range, and a clear departure from the area. Tiny candles and overlapping wicks tell me the market is negotiating, not repricing.
Strong expansion often creates a fair value gap, also called an imbalance. That gap is not required for every trade, but it adds weight. When the order block and imbalance sit near each other, the market often has a reason to revisit the area before deciding whether to continue. You can study that concept in the full guide to fair value gaps.
In my own chart work, the blocks that fail most often are the ones created from slow, emotional labeling. A trader sees a move, scrolls backward, grabs the nearest opposite candle, and calls it institutional. That is backward analysis. Mark the decisive leg first, then identify its origin.
How Do You Identify a Valid Smart Money Order Block?
Start with the impulse leg
The first job is to find the move that matters. Look for a leg that moves away aggressively and changes something on the chart. That “something” can be a break above a prior high, a break below a prior low, a failed breakout, or a reclaim after a stop-run.
Once the impulse is clear, trace it back to the final opposing candle before the move begins. For a bullish block, that means the last bearish candle before price accelerates upward. For a bearish block, it means the last bullish candle before price drops with force.
This sequence keeps the process honest. The structure creates the reason. The candle defines the zone. Without the structure, the zone is usually just decoration.
Validation needs structure and liquidity
A valid zone should pass three tests. First, the move away should show urgency. Second, price should break structure or create a credible change of character. Third, liquidity should be part of the story, either swept before the move or targeted during the move.
Liquidity is the fuel. Markets often move toward resting orders because that is where transactions can occur. Equal highs, equal lows, clean trendline lows, prior day extremes, and obvious swing points all attract attention. A block that forms after taking one of those areas is stronger than a block that forms in empty space.
For example, a bullish setup has more weight when price first runs below a prior low, rejects below it, then surges through the most recent lower high. That shows a raid, a reaction, and a structural shift. Without those pieces, the setup becomes weaker.
Refining the zone
Traders usually mark one of three versions of an order block:
- Full wick range: the entire candle from high to low. This gives price more room and reduces the chance of missing a reaction, but the stop is wider.
- Candle body: the open-to-close range. This creates a tighter zone, but price may wick deeper before reacting.
- Efficient segment: the part of the candle or range most aligned with imbalance, volume concentration, or a lower-timeframe origin point.
There is no universal best choice. A swing trader using the four-hour or daily chart may prefer the full range. A scalper may refine to the body or a nested lower-timeframe block. The key is consistency. Changing the rules after price approaches the zone is usually just fear dressed as analysis.
I like to refine only after the higher-timeframe story is clear. A low-timeframe candle inside a poor higher-timeframe location does not impress me. It might still react, but the trade has less structural backing.
How Should Traders Execute Order Block Trading?
Wait for the return
Order block trading begins after price returns to the area, not when you first discover the candle. Chasing the impulse defeats the purpose. The block is useful because it gives you a planned location where risk can be defined before entry.
Price does not have to revisit every valid zone. Many strong moves leave without coming back. That is part of the business. Missing a move is not a trading error. Taking a poor entry because you could not wait is.
When price returns, watch how it behaves. A fast stab into the zone followed by rejection tells a different story from slow acceptance through the level. A good reaction should show that the market is defending the area or that the opposing side failed to continue.
Confirmation improves the setup
Confirmation can take several forms. Some traders use a rejection wick on the trading timeframe. Others wait for a lower-timeframe structure shift. More aggressive traders enter as price tags the zone with a predefined stop beyond the extreme.
A common execution model looks like this:
- Higher timeframe defines bias and the main block.
- Price returns into the refined area.
- Lower timeframe shows rejection, a small structure shift, or a fresh execution block.
- Entry is placed with invalidation beyond the block’s high or low.
- Targets are set before the trade is opened.
This is where a lot of retail traders get sloppy. They identify a good area, then improvise the entry. That usually leads to late fills, emotional stops, and targets that move every time price hesitates.
Risk, invalidation, and targets
The cleanest invalidation point is beyond the order block extreme. For a bullish setup, that means below the low of the block. For a bearish setup, that means above the high of the block. Some traders add a small buffer to account for spread, volatility, and stop runs.
Targets should come from the chart, not from hope. Common targets include opposing liquidity, prior highs or lows, fair value gaps, range midpoints, or the next higher-timeframe level. A bullish block near discount pricing might target buy-side liquidity above a prior swing high. A bearish block near premium pricing might target sell-side liquidity below recent lows.
Never ignore the distance between entry, invalidation, and target. A beautiful order block with poor reward relative to risk is still a poor trade idea. The market does not pay extra because your analysis is elegant.
For crypto traders, the same logic applies, but volatility demands more room. Bitcoin and Ethereum often raid obvious levels before making the real move. The guide on how to trade Bitcoin expands on handling that kind of volatility without turning every wick into a crisis.
Order Block vs Support and Resistance: What Is the Difference?
Broad reaction area versus specific origin zone
The simplest way to compare them is this: support and resistance are historical reaction zones, while order blocks are specific origin points of structural movement. Support might be an area where price bounced three times. Resistance might be a ceiling where rallies stalled. An order block is tied to the candle or range that launched a meaningful move.
That difference changes the analysis. A support trader may care mainly that buyers showed up at the same level before. An SMC trader wants to know whether liquidity was taken, whether the move away created imbalance, and whether structure shifted afterward.
Both approaches can be useful. I am not interested in pretending one style owns the market. But they answer different questions.
Overlap does not equal validation
An old support level can overlap with a bullish block. An old resistance level can overlap with a bearish block. That overlap can strengthen the location because more traders are watching the area and more orders may sit nearby.
Still, overlap alone is not enough. A horizontal level that has reacted many times may become weaker as it gets tested. A genuine block may only need one clean origin move to matter. The logic comes from cause and reaction, not from how many times price touched the line.
This is why the phrase order block vs support resistance can be misleading. The two concepts are not enemies. They are different lenses. A chart zone can satisfy both, but I still need the order block criteria before I trade it as one.
Repeated reactions versus one clean structural move
Imagine EUR/USD bouncing from the same level several times. That is support. Now imagine price sweeping below that level, reclaiming it, and launching through a prior swing high with large candles. The final bearish candle before the rally is a bullish order block candidate.
The first idea says, “buyers have reacted here before.” The second says, “aggressive buying began here after liquidity was taken, and price changed structure.” That is a stronger narrative for SMC traders.
The same applies on the short side. Repeated stalls under a level mark resistance. A push above that level, followed by a hard selloff that breaks structure, identifies a possible bearish block at the origin of the decline.
Which Order Blocks Should Traders Avoid?
Weak zones formed in chop
Avoid blocks formed inside messy, overlapping price action. Ranges can produce dozens of opposing candles, and most of them mean nothing. Without expansion away from the zone, there is no strong evidence that one side took control.
Middle-of-range blocks are especially dangerous. Price has no clear premium or discount advantage, liquidity may be scattered on both sides, and direction is often random. The best locations usually sit near a range extreme, after a liquidity event, or in alignment with a higher-timeframe bias.
If the chart looks like noise, the correct action is often to do nothing. That sounds boring because it is. Boring saves accounts.
Heavily mitigated zones
Be cautious with order blocks that price has already tapped several times. Each return may consume resting interest in the area. The first mitigation is often the cleanest. Later visits can still work, but the odds of a sloppy reaction increase.
A fresh zone is not automatically valid, and an old zone is not automatically dead. The question is whether price already used the area for its intended reaction. Repeated deep taps, long consolidation inside the block, and weak departures after each visit all reduce the quality.
One failure case is common: price returns to a bullish block, bounces slightly, then fails to break any lower-timeframe high. Traders assume the block “held,” but the bounce was only a pause. Price rolls over, trades through the low of the zone, and continues lower. The warning was acceptance inside the area without real displacement away from it.
Higher timeframe for bias, lower timeframe for execution
Higher-timeframe blocks usually carry more weight because they filter noise and connect to larger liquidity pools. Daily, four-hour, and one-hour zones often define the broader idea. Lower-timeframe blocks can then help with entries, tighter stops, and timing.
The tradeoff is noise. A five-minute block may look perfect and still fail because it sits against the larger flow. That does not make lower-timeframe execution useless. It means the lower chart should serve the higher chart, not override it.
A practical top-down workflow is simple: mark the higher-timeframe structure, identify premium and discount areas, note the major liquidity pools, then drill down only when price reaches a location worth trading. For more applied examples, browse the SMC trading strategies section.
FAQ
What is an order block in trading?
An order block in trading is a specific candle or price range that forms before a strong expansion move. In SMC, it is usually the last opposing candle before price breaks structure, suggesting an area where institutional-style buying or selling may have originated.
How do I know if an order block is valid?
A valid block should connect to market structure, not a random reaction. Look for strong movement away from the zone, a break of structure or change of character, and a clear liquidity event such as a sweep, stop-run, or targeted high or low.
Is an order block the same as support and resistance?
No. Support and resistance are broad areas where price has reacted historically. An order block is more specific: it is the origin zone of a strong move that changes or continues structure. A level can overlap with both, but the logic is different.
Should I use the candle body or wick for an order block?
Both methods can be valid depending on the strategy. Many traders mark the full wick range for a wider, safer zone, then refine to the candle body or most efficient segment for tighter risk. The key is consistency and confirmation before entry.
What timeframe is best for order block trading?
Higher-timeframe order blocks are usually better for bias, location, and major trade ideas because they filter noise. Lower-timeframe blocks can help with execution and tighter entries, but they fail more often. Many traders combine both for top-down confirmation.
The forward-looking takeaway is simple: stop asking whether a candle “is” an order block in isolation. Ask what it caused, what liquidity it interacted with, and what price does when it returns. That is where the real read begins. What part of order block selection gives you the most trouble?
Disclaimer: This content is for educational purposes only and is not financial advice, investment advice, or a recommendation to buy or sell any market.