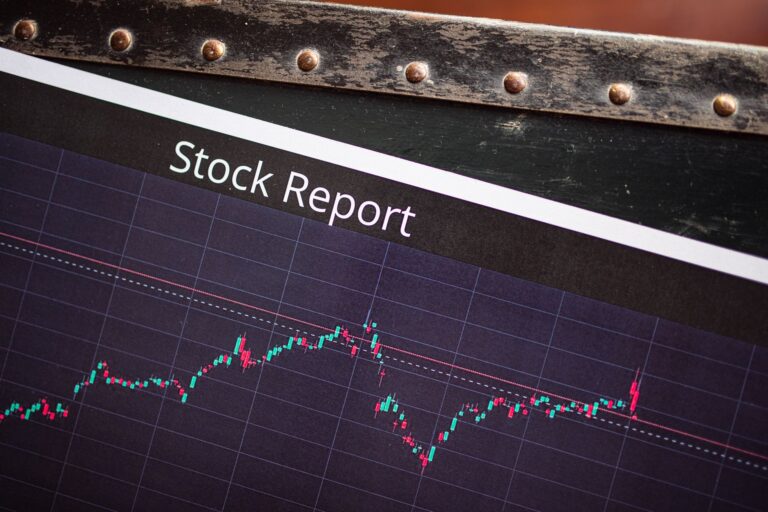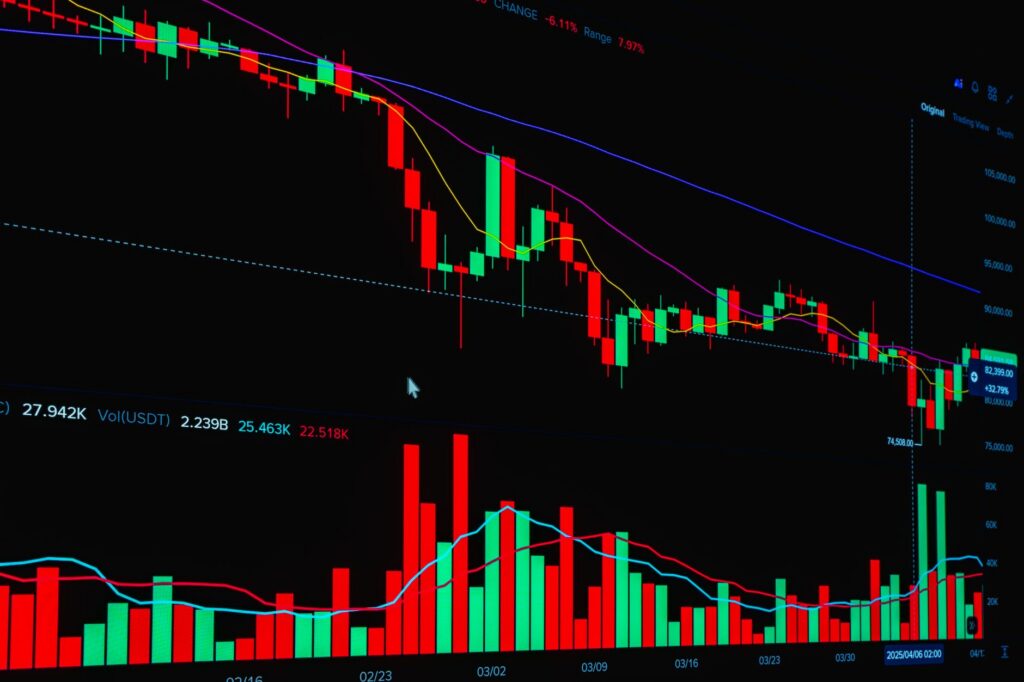
You’re staring at a chart where price ripped away from a level, came back days later, tapped the same area, and reacted like someone defended it. The hard part is knowing whether that zone matters or whether you’re just drawing boxes around hindsight. That’s why traders keep asking what is an order block in trading, and why the answer needs rules, not vibes.
An order block is the last opposite candle or compact consolidation before a forceful expansion that breaks structure or changes character. SMC traders treat it as a likely origin of institutional order flow, especially when price first raids liquidity, leaves imbalance, and later returns to test the zone.
The idea matters because modern markets are full of forced positioning, leverage, and fast repricing. As one example of how leverage keeps expanding, StockTitan reported that VS Trust amended an SEC filing for six 3x daily ETFs. In commodities, MarketScreener reported an oil setup with OPEC+ holding steady and five producers set to report. Those facts don’t create an order block by themselves, but they show why price can reprice aggressively when large participants adjust exposure.
What Is an Order Block in Trading?
A practical definition of the zone
An order block is a price zone that appears immediately before an aggressive move away from balance. In a bullish example, it is usually the final down candle before price launches upward. In a bearish example, it is usually the final up candle before price drops with authority. Sometimes it is not one clean candle. It can be a tight base where several small candles overlap before expansion.
The important phrase is before expansion. A random candle at a low is not enough. A red candle before a green candle is not enough. The zone needs to sit at the origin of a meaningful move that changes the conversation on the chart.
For me, the cleanest order blocks are boring before they matter. Price sits there, compresses, looks unremarkable, then leaves violently. That violent exit is the clue that passive resting orders, aggressive execution, or both may have been active around that price area.
Why SMC traders care about the origin of the move
In order block trading, the goal is not to predict every turn. The goal is to locate the area where a larger player may have built or defended a position before the market moved. When price returns to that same area, traders watch for a reaction because unfilled interest may remain there, or because the market may use the zone as a reference point for continuation.
That does not mean price has to reverse. A smart money order block is a possible decision area. It is not a magic line. The trader still needs context, confirmation, and risk control. Price can slice through a beautiful-looking zone when the broader trend, news flow, or liquidity conditions overpower the setup.
Why every supply or demand zone does not qualify
A common beginner mistake is calling every rally base rally or drop base drop an order block. That dilutes the concept. A supply or demand zone can simply be a prior reaction area. An order block smc setup should be tied to three things: structure, liquidity, and a clear reaction.
- Structure: the move away should break a swing point or signal a change in character.
- Liquidity: the move often begins after stops are swept above highs or below lows.
- Reaction: price should leave the area with speed, range expansion, and intent.
My opinion is blunt: most boxes traders draw are too wide, too late, and too disconnected from market structure. A useful order block should explain why price moved, not simply where price paused.
How Do Bullish and Bearish Order Blocks Form?
Bullish order blocks start before upside displacement
A bullish order block forms when price makes a final push down, often into sell-side liquidity, then reverses sharply and breaks higher. The zone is usually the last bearish candle before the upward expansion. That candle represents the final opposing push before buyers take control.
Picture price trending lower into a prior swing low. Sellers see the break and pile in. Stops from earlier longs are triggered. Then price snaps back above the level and drives through a short-term swing high. The last down candle before that drive becomes the bullish order block candidate.
The stronger version has more than a bounce. It creates displacement. Wide-bodied candles, little overlap, and a clean break of structure tell you buyers did more than defend a level. They forced a repricing.
Bearish order blocks begin before downside expansion
A bearish order block is the mirror image. Price pushes upward, often taking buy-side liquidity above a recent high, then sells off aggressively. The zone is typically the final bullish candle before the drop.
The logic is simple. The last up candle can mark the area where late buyers were absorbed and larger sellers became dominant. When price later returns, that area may act as a supply reference, especially when the larger trend favors lower prices.
A strong bearish candidate should lead to a meaningful break below market structure. A small pullback after an up candle is ordinary price movement. A sharp drop that breaks a swing low, leaves inefficiency, and shifts momentum is different.
Consolidation-based order blocks
Some of the best zones are not single candles. They are small consolidations before an impulsive leg. Price trades sideways, ranges tighten, volume may compress, and then the market expands away. That base can become the order block because it marks the area where orders likely accumulated before the move.
In crypto and forex, I see this often around session transitions, prior highs or lows, and higher-timeframe levels. Price chops inside a compact range, sweeps one side, then expands through the other. The entire base may matter, but the trader can refine it later using lower-timeframe structure.
The danger is overmarking. A broad range that lasted too long can lose usefulness because it contains too many competing prices. Compact is better. Clean expansion is better. A zone that launches a break of structure carries more information than a messy rectangle in the middle of noise.
SMC Validation Rules for a Smart Money Order Block
Displacement shows urgency
Displacement is the first filter. Price should leave the zone with force. I want to see wide candle bodies, fast travel, minimal overlap, and a clear rejection of the previous direction. In forex, that may appear as a sharp London or New York expansion. In crypto, it may show as a fast drive through several minor levels after a liquidity grab.
Displacement matters because order blocks are about intent. Slow movement away from a level does not prove much. It may simply be normal rotation. A forceful leg suggests that one side of the market became urgent enough to overwhelm the other side.
Good expansion often leaves an inefficiency on the chart. Many SMC traders call that a fair value gap. The gap is not mandatory, but it strengthens the story because it shows price moved so quickly that little balanced trading occurred inside part of the leg.
Structure shift confirms the zone mattered
The move away should do something structurally meaningful. In an uptrend, a bullish block that launches price through a prior swing high has more value than a zone that only creates a small bounce. In a downtrend, a bearish block that breaks a prior swing low deserves more attention than a weak reaction inside a range.
Traders use two common structure terms here. A break of structure usually means trend continuation through a key swing. A change of character means the market may be shifting direction after taking liquidity. The names matter less than the chart behavior: price must prove that the zone influenced the next leg.
A valid order block does not need to be perfect. Markets are auction processes, not geometry tests. Still, the best examples leave a visible before-and-after effect. Price was rotating, tapped liquidity, then repriced.
Liquidity and imbalance improve the odds of a clean read
Liquidity gives the move a reason. Before a strong reversal or continuation, price often trades into obvious stops. Buy stops rest above highs. Sell stops rest below lows. Large players need liquidity to enter or exit size, so those pools matter.
A liquidity sweep before an order block is one of the strongest contextual clues. Price runs a high or low, invites breakout traders, triggers stops, then rejects and expands in the opposite direction. That sequence tells a better story than a zone floating in the middle of the chart.
Imbalance adds another layer. When price leaves fast and creates an inefficient leg, traders can use the nearby gap, the order block, and the structure break together. One signal alone is thin. A cluster of evidence is harder to ignore.
- Weak candidate: a candle before a small bounce, with no structure shift.
- Better candidate: a final opposing candle after a stop-run, followed by expansion through a swing point.
- High-quality candidate: liquidity raid, displacement, imbalance, structure break, and a clean return into the zone.
How to Identify Order Blocks Step by Step
Start with the market structure map
Before marking any zone, read the structure. Identify the trend, major swing highs, major swing lows, and obvious liquidity pools. Without that map, you are just decorating the chart.
On a higher timeframe, decide whether price is making higher highs and higher lows, lower highs and lower lows, or sitting inside a range. Then mark the swing point that caused the latest shift. That impulse leg is your anchor. The order block candidate should sit at the origin of that leg, not randomly inside the move.
For traders building a full SMC framework, I’d study order blocks alongside liquidity, fair value gaps, and market structure rather than treating them as separate tools. The full framework matters more than any single box.
Find the origin of the impulse leg
After the impulse leg is clear, look backward to find the last opposing candle before the move began. For a bullish leg, locate the last bearish candle before price expanded upward. For a bearish leg, locate the last bullish candle before price expanded downward.
When the launch came from a tight base, mark the consolidation instead of forcing a single candle. The base should be compact and directly connected to the expansion. A consolidation 30 candles before the move is usually too far removed to be useful.
Pay attention to the candle immediately before expansion, but also check the lower timeframe. Sometimes the higher-timeframe candle contains a smaller internal structure: a sweep, a shift, and a refined block. That lower-timeframe view can help reduce risk without losing the higher-timeframe idea.
Refine the zone without overfitting it
Traders draw order blocks in several ways. Some use the full candle range, including wicks. Others use the candle body. Some refine to the open, midpoint, or a lower-timeframe block inside the larger candle.
There is no universal drawing method that works across every asset and volatility regime. What matters is consistency. A wide zone gives price more room to react but increases risk distance. A refined zone creates a cleaner reward-to-risk profile, but price may miss it before moving.
I usually start with the full range of the last opposing candle, then refine only when the lower timeframe supports it. I do not shrink the zone just to make a trade look attractive. That is curve-fitting in real time, and it usually leads to bad decisions.
- Full range: useful when volatility is high and wicks matter.
- Body only: cleaner when the wick was just a liquidity probe.
- Lower-timeframe refinement: best when the higher-timeframe zone is too wide for practical risk.
Align the setup with higher-timeframe bias
A five-minute bullish block inside a daily downtrend can react, but the broader flow may cap it quickly. A lower-timeframe bearish block that aligns with a weekly supply area and fresh downside structure has a different profile.
This is why I separate location from entry. The higher timeframe gives location and bias. The lower timeframe gives timing. Traders get into trouble when they use a tiny order block to fight a major structure level without realizing they are trading into a wall of opposing order flow.
For crypto traders, this matters even more because volatility can make every small reaction look meaningful. A Bitcoin or Ethereum chart may produce dozens of intraday zones, but only a few align with the higher-timeframe narrative. For broader context on crypto execution, see this guide on how to trade Bitcoin.
Order Block vs Support and Resistance: What Changes?
Support and resistance describe historical reaction areas
Traditional support and resistance focus on levels where price previously stalled, reversed, or consolidated. A support level forms where buyers have reacted before. A resistance level forms where sellers have reacted before. These areas can be useful because markets remember prices where participants previously made decisions.
The problem is that support and resistance can become too broad. Traders draw a horizontal line across every reaction, then expect price to respect it forever. Markets do not work that cleanly. A level may hold once, fail later, then become irrelevant as positioning changes.
Order blocks focus on the source of institutional order flow
The difference in order block vs support resistance analysis is the reason for drawing the level. Support and resistance start with repeated reaction. Order blocks start with the suspected origin of aggressive flow before a meaningful displacement.
That changes the question. Instead of asking, “Did price bounce here before?” the order block trader asks, “Did price leave this area with enough force to suggest larger participation, and did that move alter structure?”
The order block approach is more demanding. A level does not qualify because price touched it three times. It qualifies because it launched a move that changed the chart, preferably after liquidity was taken.
Repeated touches can weaken the story
With classic support and resistance, traders often like multiple touches because they confirm the level. With order blocks, repeated tests can be a warning. Each return may consume resting orders. By the third or fourth tap, the zone may have less fuel left.
That is one reason fresh zones matter. A fresh order block has not been retested since the displacement. Price returning for the first time often gives the cleanest read. Later reactions can still work as trades, but the level becomes less pure as more participants interact with it.
There is one overlap worth respecting: both methods care about location. A bullish order block at a major higher-timeframe support area can be powerful. A bearish block sitting at long-term resistance may carry extra weight. The strongest analysis often comes from stacking context without confusing the concepts.
How Should Beginners Plan Order Block Trades?
Wait for the return and read the reaction
Beginners usually rush the first touch. They mark a block, place a limit order, and hope the box holds. That can work in some systems, but it leaves no room for reading live order flow.
A more controlled plan is to wait for price to return to the zone, then watch for confirmation on a lower timeframe. Confirmation might be rejection wicks, a small change of character, a local liquidity grab, or a fresh displacement away from the block.
For example, price returns to a bullish higher-timeframe block after a strong rally. On the lower timeframe, it sweeps a minor low inside the zone, reclaims the range, and breaks a short-term swing high. That gives the trader more information than blindly buying the first touch.
Place invalidation where the idea is wrong
Invalidation should sit beyond the zone in a place that proves the idea has failed. For a bullish setup, that often means below the block or below the liquidity low that created it. For a bearish setup, it often means above the block or above the liquidity high.
The target should also come from the chart. Logical targets include opposing liquidity, unfilled inefficiencies, prior swing highs or lows, and nearby structure. A trade plan that has a beautiful entry but no target is incomplete.
Risk needs to be defined before entry. The market does not care how good the box looks. Position size should match the distance to invalidation, the trader’s account rules, and the volatility of the asset. A tight stop inside a valid zone often gets clipped by normal testing. A wide stop with oversized position risk is just poor execution.
Common beginner mistakes
The first mistake is marking every large candle as an order block. A big candle can be displacement, but the block is normally the origin before that movement. Confusing the impulse candle with the order block leads to late entries.
The second mistake is ignoring higher-timeframe bias. A bullish five-minute zone against a fresh daily bearish expansion is usually a lower-quality setup. It may scalp, but beginners often treat it like a major reversal.
The third mistake is entering inside chop. Order blocks inside a messy range are harder to trust because structure is unclear. Price can bounce from both sides of the range, sweep both ends, and punish anyone who assumes clean directional intent too early.
The fourth mistake is using confirmation so late that the trade becomes unattractive. Waiting for proof is good. Waiting until price has already traveled most of the way to target is not. Entry quality and confirmation must balance each other.
How order block setups fail
Order blocks fail when the market no longer respects the original order flow. Price may return to the zone, pause briefly, and then drive through it. That failure is useful information. It often means the opposing side absorbed the remaining interest or that higher-timeframe pressure is stronger than the local setup.
A common failure case is the “pretty block in the wrong place.” Price creates a clean bullish block, but it sits directly below a major higher-timeframe bearish area. The lower-timeframe reaction looks valid for a moment, then sellers overwhelm it and price breaks through the block. The original zone was not useless. It was simply subordinate to a larger flow.
Another failure occurs after too many retests. Price returns once and reacts. It returns again and reacts less. On a later visit, the zone breaks cleanly. That pattern suggests the area was gradually consumed. Traders who understand this do not treat old blocks like permanent barriers.
News and event risk can also erase technical precision. Earnings, central bank decisions, exchange disruptions, and macro shocks can push price through zones that looked excellent minutes earlier. Technical context helps, but it does not suspend market reality.
A simple planning checklist
- Mark the higher-timeframe trend and key swing points.
- Identify the impulse leg that broke structure or changed character.
- Locate the last opposing candle or compact base before the move.
- Check for a liquidity raid before the expansion.
- Look for imbalance or inefficient price delivery near the move.
- Wait for a return, then judge lower-timeframe reaction.
- Define invalidation beyond the zone before entering.
- Target opposing liquidity, structure, or inefficiencies.
That checklist will keep you from drawing random rectangles. It also forces you to treat an order block as a trade idea, not a prediction. For more setups that combine structure, liquidity, and execution, browse these SMC trading strategies.
FAQ
What is an order block in trading?
An order block is the last opposing candle or consolidation area before a strong displacement move. In SMC, traders use it to locate where institutional buying or selling may have entered, especially when the move also breaks structure, sweeps liquidity, and leaves an imbalance.
How do you identify a valid order block?
Start by marking market structure and the impulse leg that caused a break of structure or change of character. Then locate the last opposite candle before the displacement. A higher-quality order block usually follows a liquidity sweep and has a nearby fair value gap or inefficiency.
Is an order block the same as support and resistance?
No. Support and resistance are historical levels where price reacted before. An order block is an SMC zone tied to the suspected origin of institutional order flow. It should show displacement, structure shift, liquidity context, and a meaningful reaction, rather than relying only on repeated price touches.
What is the difference between bullish and bearish order blocks?
A bullish order block forms before upside displacement, usually at the last down candle or consolidation before price breaks higher. A bearish order block forms before downside displacement, usually at the last up candle or consolidation before price breaks lower and shows selling pressure.
Which timeframe is best for order block trading?
Higher-timeframe order blocks often carry more weight because they reflect larger market structure and bigger liquidity pools. Lower-timeframe zones can refine entries and reduce risk, but they are more prone to noise, false reactions, and choppy price action.
Order blocks are most useful when they force discipline: find the origin, demand displacement, check liquidity, and define the failure point before money is at risk. The next time price returns to one of your zones, ask the only question that matters: does the live reaction still support the original story?
Disclaimer: This content is for educational purposes only and is not financial advice, investment advice, or a recommendation to buy or sell any financial instrument.