
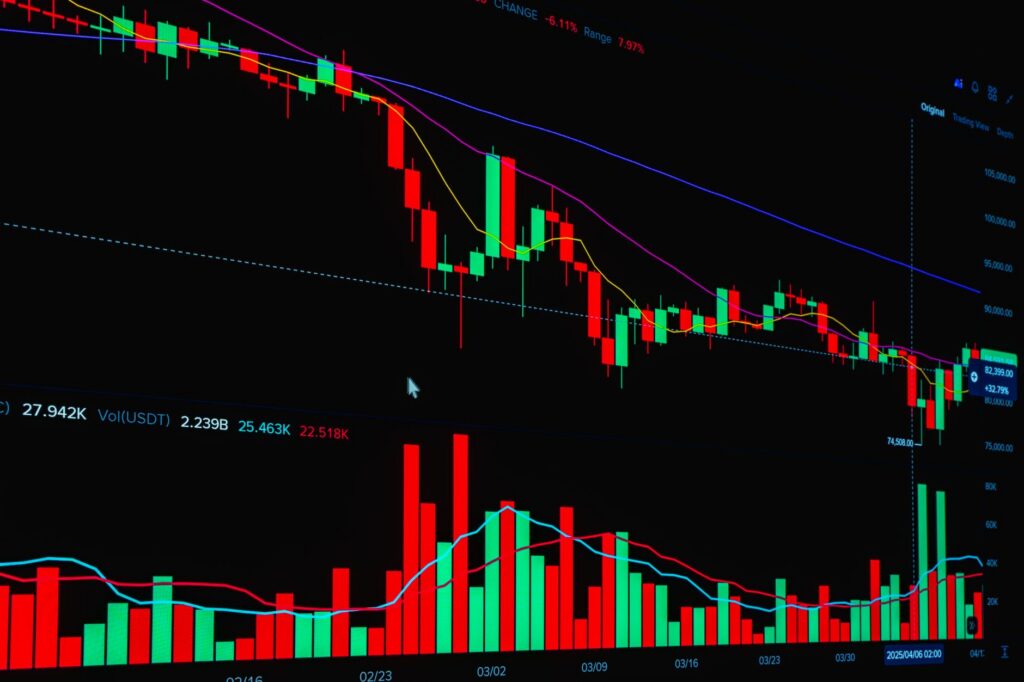
You mark a zone, price taps it, and for a moment it looks perfect. Then the candle blows straight through your level and you wonder whether the setup failed or whether the zone was never valid. The practical question, what is an order block in trading, matters because sloppy marking turns Smart Money Concepts into decorative chart art.
An order block is the last opposing candle or tight candle cluster before a strong expansion that creates market imbalance and often breaks structure. In Smart Money Concepts, it marks the origin of a repricing move where aggressive order flow likely entered, giving traders a potential return zone for planned entries.
Price action does not happen in a vacuum. News and liquidity shocks can distort clean chart ideas. For example, Bitget reported a Nasdaq trade halt notice timestamped at 07:50 PM, while a syndicated crypto headline on markets.businessinsider.com referenced ETH testing $2,434 and a claimed 1,900% presale ROI. Those are headline facts, not order-block validation. I care far more about where price expanded from, what structure changed, and whether liquidity was taken before the move.
What Is an Order Block in Trading?
In SMC language, an order block is a price zone that sits at the origin of a meaningful impulse. The cleanest version is the final bearish candle before a bullish expansion, or the final bullish candle before a bearish expansion. Sometimes the origin is not one candle. It can be a narrow base of two, three, or several small candles where price compressed before the release.
I use the concept as a map, not a signal by itself. A zone can be beautiful, boxed neatly, and still be useless if it did not cause anything important. The move away from the area has to matter. It should leave imbalance, travel with urgency, and change the structure enough that other traders are forced to reassess direction.
SMC definition: the last opposing candle or tight candle cluster before an impulsive repricing move
Think of a bullish zone as the last visible selling candle before buyers overwhelmed the book. For a bearish version, invert it. The last buying candle before sellers took control becomes the candidate area. That final opposing candle is useful because it often marks the place where the market trapped late participants, absorbed orders, or initiated aggressive flow.
For newer SMC traders, I recommend studying the broader framework before obsessing over boxes. Our Smart Money Concepts guide explains market structure, liquidity, imbalance, and premium-discount context. Order blocks make more sense once those pieces are already on the chart.
Why the best order blocks usually create a break of structure or change of character
A strong zone should produce a structural consequence. In an uptrend, a bullish block that launches price through a previous swing high carries more weight than one that creates a small bounce inside a range. In a downtrend, a bearish block that sends price through a prior swing low is more meaningful than a candle that only creates a minor pullback.
Break of structure and change of character are not magic labels. They are ways to describe who just lost control. When price breaks a key swing point with force, traders positioned the other way are under pressure. Stops trigger. New momentum traders pile in. Algorithms react. That chain reaction is exactly why the origin of the move becomes interesting later.
Why an order block is not a magic zone or every visible supply and demand area
Here is my firm opinion: most retail order block charts are overdrawn. Traders box every red candle before a green candle and call it institutional demand. That is lazy analysis.
A proper zone is not just any place price paused. It should connect to a clear event. Did price sweep liquidity before leaving? Did it break a structural point? Did it leave a fair value gap or obvious imbalance? Did the move happen with speed rather than slow overlap? Those questions separate a meaningful smart money order block from a random rectangle.
How Do Bullish and Bearish Order Blocks Form?
Order blocks form when a market transitions from acceptance to repricing. Price trades in one area, finds enough opposing liquidity or trapped positioning, then moves away so aggressively that the prior price becomes inefficient. Later, price may return to that origin to rebalance, mitigate orders, or test whether the same side of the market still defends the area.
Bullish order block: the last down candle or base before aggressive buying expansion
A bullish block usually starts with weakness on the surface. You see a bearish candle, maybe a small cluster of dull candles, and then a sudden drive upward. The key is what happens after that final down candle. Strong buying should expand away, take out a meaningful swing high, or at least create a decisive shift in local structure.
A typical scenario looks like this. Price trades below a previous low, triggers sell stops, stalls, then rockets upward through the last short-term high. The last bearish candle before the expansion becomes the candidate area. The stop-run below the low gives the move a liquidity story. The expansion confirms urgency. The structure shift gives the idea context.
Bearish order block: the last up candle or base before aggressive selling expansion
A bearish block is the mirror image. Price pushes higher into buy-side liquidity, maybe above a visible high. Buyers get drawn in, stops from short sellers are triggered, and then the market rejects sharply. The last bullish candle or tight base before the selloff becomes the area to watch on a future return.
The strongest bearish zones are usually born after price raids a high and then sells hard enough to break a swing low. That sequence tells a cleaner story than a random red candle on a chart. Liquidity was accessed. Buyers were trapped. Sellers took control.
How expansion reveals imbalance, urgency, and potential institutional-style repricing
Expansion tells you that price did not transact comfortably through the area. Large bodies, shallow pullbacks, and unfilled sections of the move show inefficient delivery. Many traders call that inefficiency a fair value gap. I treat it as supporting evidence, especially when it appears directly after the candidate block. You can read more in our guide to fair value gaps in trading.
There is no need to romanticize the word institutional. You and I do not know exactly who placed every order. What we can observe is behavior. Some moves show urgency. Some do not. The market leaves footprints, and expansion away from a precise origin is one of them.
What Makes an SMC Order Block Valid?
Order block SMC validation is about evidence stacking. One factor rarely carries the trade. I want to see a qualified origin, a forceful departure, a structural result, and a logical liquidity narrative. The more of those pieces align, the more seriously I take the zone.
Validity rule 1: clear expansion away from the zone, not a weak drift
The move away from the candidate area should look intentional. A lazy grind with overlapping candles tells me the market is still negotiating price. A sharp departure tells me price was rejected or repriced. That difference matters.
Strong expansion often includes wide candles, minimal overlap, and little immediate retracement. It may leave an inefficient gap between candle wicks or bodies. I do not require perfection, but I do want the chart to show urgency. Without that, the block is usually just a pause before continuation.
Validity rule 2: break of structure, change of character, or meaningful structural consequence
A candidate block becomes more credible when the move from it breaks something. In bullish conditions, price should reclaim a prior high or shift the lower-timeframe trend. In bearish conditions, price should lose a prior low or create a clear reversal signature.
Context controls the meaning. A five-minute zone that breaks a tiny internal high may help with execution, but it does not carry the same authority as a four-hour zone that changes the larger swing sequence. I prefer higher-timeframe zones for narrative and lower-timeframe zones for timing.
Validity rule 3: liquidity taken or targeted, plus limited prior mitigation of the block
Liquidity gives the setup its fuel. Before a bullish expansion, I like seeing price raid sell-side liquidity, such as a prior low, equal lows, or an obvious support shelf. Before a bearish move, buy-side liquidity above highs often matters. Our guide on liquidity sweeps breaks down that mechanic in more detail.
Mitigation matters too. A clean first return to a fresh zone is different from the fourth or fifth tap. Repeated revisits can consume the resting interest that made the area useful. I do not automatically discard a previously touched zone, but I reduce its importance unless the broader structure still supports it.
How to Identify Order Blocks Step by Step
Learning how to identify order blocks is mostly learning what to ignore. Beginners look for candles first. I look for the impulse first. The box comes later.
First, mark the impulse leg that caused structural change
Start with the move that actually changed the chart. Find the candle sequence that broke a swing high, broke a swing low, or shifted the local character of the market. This keeps you from randomly selecting candles simply because they are red or green.
Work from higher timeframe to lower timeframe. On a four-hour chart, identify the main swing structure and obvious liquidity pools. Then drop to a one-hour or fifteen-minute chart to refine the origin. For crypto, where weekends and thin liquidity pockets can create messy action, this top-down process is especially useful. Our Bitcoin trading guide covers that broader execution context.
Next, locate the origin candle or compact base behind the move
Once the impulse is marked, trace it backward to the last opposing candle before the expansion. For a bullish move, find the final down candle before the launch. For a bearish move, find the final up candle before the drop. When there is a small base rather than one clean candle, box the cluster that immediately preceded the release.
Do not reach too far back. The origin should be close to the expansion. A candle ten bars earlier usually belongs to a different story. The cleaner the transition from compression to expansion, the cleaner the candidate zone.
Finally, refine the zone to the body or full wick, then confirm with structure
There are two common ways to draw the zone. Conservative traders often use the full candle range, including the wick. Aggressive traders may refine to the candle body, the open-to-close area, or the section nearest the imbalance. Both approaches can work, but they produce different trade-offs.
- Full-wick marking gives price more room and may reduce premature invalidation, but the stop is usually wider.
- Body-only marking offers tighter risk, but price can wick through the body and still respect the broader block.
- Lower-timeframe refinement can improve precision, though over-refinement often creates false confidence.
After marking the area, ask whether price has already returned deeply into it. A fully mitigated zone that already produced a reaction is less attractive to me than a fresh one. After years of trading forex and crypto, my general observation is simple: the prettiest untouched zones can fail, but stale zones fail more often in the worst way, slowly enough to tempt you into adding risk.
Order Block vs Support and Resistance
The order block vs support resistance debate causes confusion because both concepts use zones. The difference is the reason for drawing them. Support and resistance usually come from repeated reactions. Order blocks come from the origin of a decisive repricing move.
Support and resistance rely on repeated reactions at a level
Traditional support forms where buyers have repeatedly defended an area. Resistance forms where sellers have repeatedly stepped in. The logic is simple and still useful. Markets remember levels because traders anchor to them, stops build around them, and pending orders often cluster nearby.
The weakness is that repeated touches can also weaken a level. Every test may consume resting orders. A level that looks stronger because it has five reactions might actually be more vulnerable to a sweep.
Order blocks focus on the origin of a large repricing move
An order block is less concerned with repeated touches and more concerned with the starting point of force. The question is not, “How many times did price react here?” The better question is, “What did price do after leaving here?”
That shift changes your chart reading. A one-touch zone can matter more than a level with many reactions when that one-touch zone launched a major structural break. This is why SMC traders care so much about impulse, imbalance, and swing points.
Why many supply, demand, support, or resistance zones do not qualify
Supply and demand traders often box bases before rallies and drops. That overlaps with order block trading, but the standards are not identical. A generic demand zone may show prior buying. A qualified SMC block should show buying that caused a structural result.
The failure case is common. Price returns to a “demand” box that was drawn only because a green rally followed a red candle. There was no liquidity grab, no structure break, no urgency. Price pauses, gives a small bounce, then trades straight through. The zone did not fail because order blocks are fake. The analysis failed because the box lacked a reason to exist.
How Do You Trade an Order Block in Practice?
Order block trading is a waiting game. The expansion has already happened. Chasing it usually means poor entry location and wide invalidation. The cleaner plan is to define the zone, wait for price to return, then look for confirmation that the market is responding.
Wait for price to return to the refined zone instead of chasing the impulse
After a strong move, price often retraces to rebalance inefficiency, retest the origin, or attack nearby liquidity. That return is where the trade may become interesting. I do not want to buy the top of a bullish impulse just because the move looks powerful. I want price to come back into an area where invalidation is clear.
Patience also filters weak ideas. Many marked zones never get revisited. That is fine. Missed trades do less damage than forced trades. A chart full of alerts is better than a journal full of impulse entries.
Lower-timeframe confirmation can sharpen the entry
When price reaches a higher-timeframe block, the lower timeframe can show whether the zone is being defended. For a bullish setup, traders often look for a sweep below an internal low, a quick reclaim, and a break of a minor high. For a bearish setup, they may watch for a raid above an internal high followed by a lower-timeframe breakdown.
The confirmation does two jobs. It reduces blind entries, and it gives a tighter place to define risk. A lower-timeframe shift inside a higher-timeframe area is cleaner than buying or selling the first touch with no reaction.
Invalidation belongs beyond the block, while targets come from liquidity, imbalance, or an opposing zone
The stop should sit where the idea is wrong, not where the loss feels comfortable. For a bullish block, invalidation usually belongs below the zone or below the liquidity sweep that created the reaction. For a bearish one, it usually belongs above the zone or above the raid high.
Targets should also be mapped before entry. Common objectives include prior highs, prior lows, unfilled inefficient price areas, or the next opposing block. I like partial target planning because it forces a trader to think in levels rather than emotions. For more execution models, browse our SMC trading strategies.
- Entry idea: return into a validated higher-timeframe zone, followed by lower-timeframe confirmation.
- Invalidation: beyond the block or beyond the sweep that set up the reversal.
- Targets: external liquidity, imbalance, or the next opposing reaction zone.
Risk still comes first. A clean block does not remove slippage, spread, funding costs, news risk, or execution mistakes. The best technical idea on the chart can be a bad trade when position size is too large.
Common Order Block Trading Mistakes to Avoid
The concept fails most often because traders simplify it until it loses meaning. They want a box that predicts price. Markets do not owe any zone a reaction. Your job is to build a case, define invalidation, and accept when the case is wrong.
Drawing every large candle or colored candle as an order block
A large candle is not automatically a valid zone. Sometimes the order block is before the large candle. Sometimes the large candle is simply news volatility. Sometimes it is the end of the move, not the beginning.
Colored-candle logic is even worse. A red candle before a rally is only a candidate. A green candle before a decline is only a candidate. The validation comes from what follows: force, structure, liquidity, and freshness.
Ignoring higher-timeframe trend context, liquidity, and market structure
Lower-timeframe blocks form everywhere. In a trending market, many countertrend zones will look tempting and still fail. A bearish five-minute block sitting directly inside a strong daily bullish leg needs extra proof. A bullish scalp zone under major higher-timeframe resistance needs respect for overhead liquidity.
Markets can also move from one liquidity pool to the next without respecting every internal area. A zone that appears perfect in isolation may sit in the middle of a larger draw toward equal highs, equal lows, a weekly imbalance, or a major session level. Context decides whether the block is tradable or just visible.
Trading fully mitigated zones, entering without confirmation, or oversizing clean-looking setups
A fully mitigated block has already been revisited. It may still work, but the edge of freshness is gone. Traders get into trouble when they keep reusing the same zone because it once reacted well. The market may have already consumed the interest there.
Blind entries are another problem. A first touch can produce a beautiful reaction, but it can also slice through the area with no warning. Confirmation is not about being timid. It is about forcing the market to show a response before capital is committed.
The most dangerous mistake is oversizing because a setup looks clean. Clean charts fail too. A high-quality zone can lose during a news release, a liquidity vacuum, or a broader trend acceleration. I would rather take smaller risk on repeatable logic than oversized risk on a screenshot-worthy setup.
FAQ
What is an order block in trading?
An order block is the last opposing candle or tight candle cluster before a strong impulsive move that creates imbalance and often breaks market structure. In SMC, it marks the origin of a repricing move, not simply any random supply, demand, support, or resistance area.
How do I know if an order block is valid?
A valid block should show clear expansion away from the zone, a break of structure or change of character, and a logical liquidity event nearby. It should also have limited prior mitigation, because a fully revisited area may already have delivered its best reaction.
What is the difference between an order block and support or resistance?
Support and resistance are usually built from repeated reactions at a price area. An order block focuses on the origin of a sharp repricing move that caused imbalance and structural change. The emphasis is less on repeated touches and more on where aggressive order flow likely began.
Should I enter as soon as price reaches an order block?
Usually, I prefer confirmation. Many traders wait for lower-timeframe evidence after price returns to the zone, such as a liquidity sweep, strong reaction, or structure shift. That helps avoid treating the block as automatic support or resistance and gives a clearer place for entry and invalidation.
Which timeframe is best for order block trading?
Higher-timeframe blocks usually carry more narrative weight because they align with broader structure and liquidity. Lower-timeframe blocks are often better for execution, confirmation, and risk refinement. Many serious traders combine both instead of relying on one timeframe alone.
Order blocks are useful when they explain a real repricing event. They become dangerous when they are treated like magic rectangles. The next time you mark one, ask the only question that matters: what did this zone actually cause?
Disclaimer: This article is for educational purposes only and is not financial advice, investment advice, or a recommendation to buy or sell any market.