
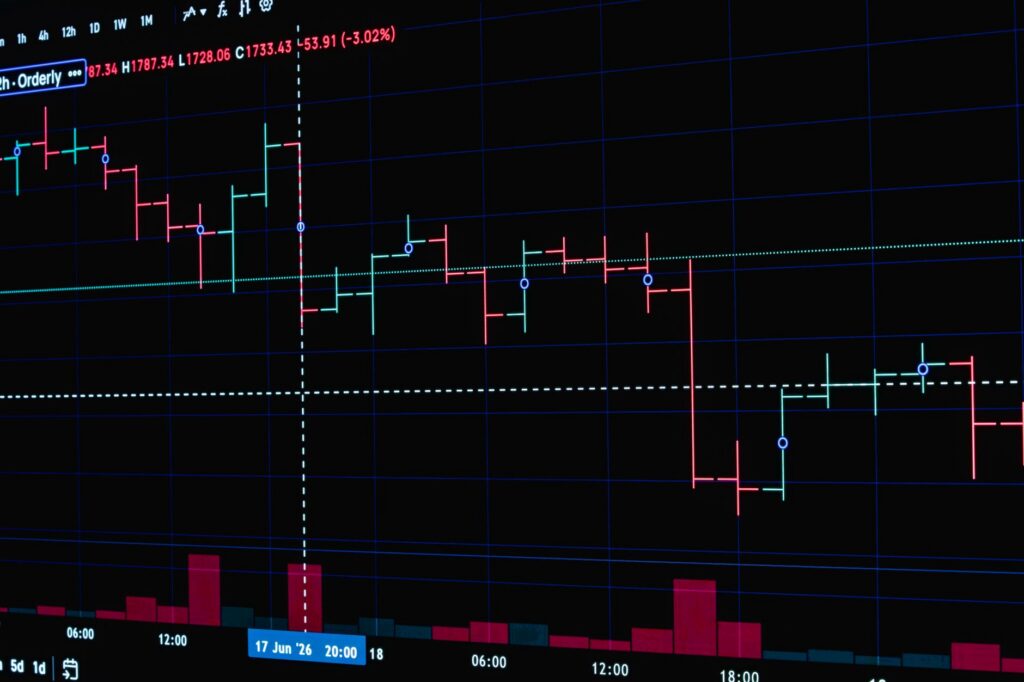
You mark a zone, price taps it, then runs straight through your stop. That usually means the zone was never an order block, or you treated every attractive candle like one. The question, what is an order block in trading, matters because the answer changes how you read structure, entries, and invalidation.
An order block in trading is a price zone built around the final opposing candle before a strong institutional-style expansion that breaks or shifts market structure. Traders use it as a probable area where large orders were positioned, then watch whether price later returns, reacts, or invalidates the original premise.
I use order blocks as context zones, not magic rectangles. A clean smart money order block should explain why price moved, where liquidity was taken, and what would prove the idea wrong. Without those three pieces, the markup is usually decoration.
Market expansion is not theoretical. Volatile sessions regularly show how aggressive repositioning can move price fast. For example, TradingKey reported a session where the Nasdaq dropped over 1% while Dell surged 8% after hours and WTI crude topped $90. Benzinga also reported a separate market update where oil topped $99 as S&P 500 and Dow futures fell. Those numbers are not trade signals, but they show why traders care about locating the last area of serious order flow before expansion.
What Is an Order Block in Trading?
SMC Definition: The Final Opposing Candle Before Displacement
In Smart Money Concepts, an order block is usually the final bearish candle before a bullish expansion, or the final bullish candle before a bearish expansion. The candle itself is not the reason the level matters. The reason is what happened after it.
For a bullish example, imagine price trades lower into a pocket of sell-side liquidity, prints one last down candle, then launches upward with large candles and breaks a prior swing high. SMC traders often mark that last down candle as a bullish order block. For a bearish example, price runs above equal highs, forms one last up candle, then sells aggressively and breaks a prior swing low. That final up candle becomes the bearish candidate.
The phrase “candidate” matters. A candle does not become useful just because it has the right color. It needs evidence around it: structure shift, expansion, liquidity context, and a future reaction that respects the zone.
Why Order Blocks Are Viewed as Institutional Footprints
Retail traders buy and sell with small orders. Institutions, funds, hedgers, and large systematic players deal in size. They often cannot execute all desired exposure at one exact tick without moving the market against themselves. SMC traders interpret certain zones as footprints of that larger execution.
The theory is simple. Before an aggressive bullish move, large players may have absorbed sell orders or built long exposure near the final bearish candle. When price later returns to that same area, unfilled interest, hedging activity, or algorithmic rebalancing may create a reaction. The order block becomes a zone where the prior imbalance could matter again.
That explanation is useful, but I do not treat it as proof that a specific bank bought a specific candle. Retail traders cannot see the full institutional book on spot FX, crypto venues, or most CFDs. We infer from price behavior. My opinion is blunt: the best order block trading comes from reading consequences, not pretending we know every hidden order.
How Order Blocks Fit Into Smart Money Concepts and Market Structure
Order blocks sit inside the broader framework of Smart Money Concepts market structure. They are not meant to be traded in isolation. A valid zone should connect with swings, liquidity, imbalance, and directional bias.
SMC traders usually begin with structure. Is price making higher highs and higher lows, or lower lows and lower highs? Has a major swing been broken? Did price raid obvious stops before reversing? These questions determine whether the block supports a continuation idea or a reversal idea.
In a clean bullish sequence, price sweeps a prior low, rallies hard, and breaks a swing high. The last bearish candle before that rally becomes interesting because it helped launch a structural shift. In a bearish sequence, price runs above a prior high, rejects, and breaks a swing low. The last bullish candle before the selloff becomes the supply zone worth watching.
How Do Bullish and Bearish Order Blocks Work?
Bullish Order Block: Last Down Candle Before Upside Displacement
A bullish order block forms when price makes a final push down, then expands sharply higher. The classic version is the last down-close candle before the upward drive. Traders expect that, on a later return, the zone may attract demand again.
Here is the practical sequence. Price trades into or below a prior low, triggering sell stops. Buyers step in. The next candles travel decisively higher and break a meaningful swing high. The order block is then marked from the last bearish candle that immediately preceded the move.
The zone can be drawn in two common ways:
- Body-only marking: from open to close of the order block candle, often used by traders who want a tighter entry zone.
- Full-range marking: from high to low of the candle, often used when wicks matter or volatility is high.
- Refined lower-timeframe marking: a smaller block inside the higher-timeframe candle, used after the higher-timeframe idea is already established.
A bullish zone does not require immediate entry. Many good setups take time to return. Some never return at all. Chasing the first rally after the block forms is how traders turn a good read into a bad fill.
Bearish Order Block: Last Up Candle Before Downside Displacement
A bearish order block is the mirror image. Price makes one last push higher, often into buy-side liquidity, then sells off with strength. The final up-close candle before the selloff becomes the area SMC traders monitor for future supply.
A typical scenario looks like this: price runs above a clean prior high, late buyers enter, stops from short sellers get triggered, and then price reverses sharply. The decline breaks a prior swing low. The last bullish candle before that decline becomes the bearish block.
The best bearish blocks are not random tops. They are connected to a clear failure of buyers to hold higher prices. That failure shows up through rejection, strong range expansion, and a break in structure. Without those pieces, a bearish rectangle is just resistance with a new label.
Why Displacement Matters More Than Candle Color Alone
Candle color is the least important part of the concept. The move away from the candle is what gives the zone meaning. A tiny green candle before a tiny red candle does not create a high-quality bearish order block. A tiny red candle before a slow, overlapping climb does not create a strong bullish one.
Expansion should look obvious. Strong candles, wide bodies, minimal overlap, and fast travel away from the zone all suggest urgency. Many traders also look for a fair value gap or visible inefficiency near the launch. That gap tells you price moved so quickly that trading was inefficient through part of the range.
When the move is slow and balanced, the order block premise weakens. Balanced price action says two-sided trade. A true institutional-style impulse usually leaves evidence that one side had control.
How to Identify Order Blocks Correctly
Start With Market Structure, Not Random Candles
The worst order block charts are covered in boxes. Every red candle in an up move gets marked. Every green candle before a dip becomes supply. That is not analysis. It is clutter.
Start with the swing map. Mark the major highs and lows first. Decide whether the market is trending, ranging, or transitioning. Then locate the move that actually changed the story. The order block should be attached to that move, not to any candle that happens to look neat.
I have reviewed thousands of retail charts over the years, and the same mistake keeps showing up: traders look for an entry zone before they know the directional narrative. That reverses the workflow. Bias first, zone second, trigger third.
Confirm Break of Structure or Change of Character
A break of structure means price violates a prior swing in the direction of the prevailing or emerging trend. A change of character is usually the first meaningful shift against the prior sequence. Different SMC traders define these terms with slightly different rules, but the job is the same: prove that the market did something important.
For a bullish block, I want to see price take out a relevant high after leaving the candle. For a bearish block, I want a relevant low broken. The swing should matter on the timeframe being traded. Breaking a tiny internal pivot inside noise is weaker than breaking a clear external swing watched by many participants.
There is nuance here. Crypto, FX, index futures, and commodities all have different volatility profiles. Bitcoin can overshoot a level and still respect the broader zone. Major FX pairs often behave more precisely during liquid sessions. The concept remains the same, but execution must adapt to the instrument.
Mark the Candle Body or Full Candle Range That Launched the Move
Once structure confirms the move, mark the block. The conservative approach uses the full high-to-low range of the final opposing candle. The aggressive approach uses the body. Some traders mark the open to 50% of the candle, but I am cautious with that method unless the block is very large and volatility supports refinement.
Here is a clean marking process:
- Find the impulsive move that broke structure.
- Locate the final opposing candle immediately before that move.
- Mark the full candle range first.
- Refine to the body or a lower-timeframe block only after the higher-timeframe logic is clear.
- Write down the invalidation level before thinking about reward.
That last point saves money. A zone without invalidation is a hope zone.
What Makes an Order Block Valid in SMC?
Strong Displacement, Fair Value Gap, or Visible Inefficiency
A valid block should launch a move with urgency. The cleaner the expansion, the more seriously I take the area on a return. Wide candles and limited overlap suggest that one side overwhelmed the other.
A fair value gap adds weight because it shows inefficient price delivery. Price did not trade evenly through that area. It moved too fast. Many SMC traders expect price to revisit part of that inefficiency before continuing, which often brings price back toward the order block.
The strongest combinations usually include structure break plus inefficiency plus liquidity context. That is the one rule-of-three I actually respect in this subject. A block with all three is different from a random candle in the middle of chop.
Prior Liquidity Sweep Before the Move
Liquidity comes from obvious highs, obvious lows, equal highs, equal lows, trendline stops, and crowded breakout points. Before many strong reversals, price first grabs liquidity on the wrong side. That raid provides fuel and traps late participants.
A bullish setup often begins with price pushing below a prior low. Sellers enter breakdowns. Long stops trigger. Then price snaps back above the low and expands higher. A bearish setup often begins with a run above a prior high, followed by a sharp rejection.
For a deeper explanation of this mechanic, read the guide on liquidity sweeps in trading. Order blocks make more sense once you understand why markets often move through obvious levels before reversing.
Clean Reaction on Return and the Role of Mitigation
Mitigation is the return to the order block after the original move. The idea is that price revisits the area where earlier orders were placed or where imbalance remains, then reacts as those orders are filled, defended, or unwound.
A clean reaction does not always mean a perfect wick touch. Sometimes price taps the body and leaves. Sometimes it trades deep into the wick, hesitates, and then reclaims the zone. What matters is whether the response confirms that the level still has influence.
Failure is just as informative. Price returning to the block, pausing briefly, then closing cleanly beyond the extreme tells you the premise is probably dead. The market has consumed the zone. Holding because “institutions must defend it” is a dangerous story. Large players change their books. Your stop should respect that.
Order Block vs Support Resistance
Support and Resistance Depend on Repeated Reactions
Traditional support and resistance zones are built from repeated reactions. Price bounces from an area several times, so traders mark it as support. Price rejects from an area several times, so traders mark it as resistance.
That approach is useful. I still watch major horizontal levels because markets remember obvious prices. The difference is the source of the logic. Support and resistance usually cares about repetition. Order block SMC analysis cares about the origin of an aggressive move.
A support level can become an order block area if it also launched a structural break after a liquidity grab. But a level is not automatically an order block just because price bounced from it twice.
Order Blocks Are Tied to Institutional Execution and Displacement
An order block is linked to execution before expansion. The focus is on where the aggressive repricing began. That is why the final opposing candle matters. It is the last area where price traded before one side took control.
Support and resistance traders might wait for the third or fourth reaction. SMC traders often prefer the first return after the block forms. The first return is usually called the freshest mitigation. It has not been tested repeatedly, and the original imbalance may still be more relevant.
This difference changes risk. A support trader may place a stop below the broader horizontal base. An order block trader usually places invalidation beyond the specific candle or refined zone that launched the move.
Why Repeated Taps Can Weaken an Order Block
Repeated touches can make traditional support or resistance more visible, but they can weaken an order block. Each return may consume resting orders in the zone. Each tap can reduce the imbalance that made the block interesting in the first place.
Picture a bullish block that reacts once, then price comes back again, then again. By the third or fourth visit, the zone may no longer contain the same demand. Buyers who wanted that price may already be filled. Sellers may also become more confident pressing into it.
That does not mean every retest fails. It means freshness matters. My preference is the first clean return, or a refined entry after price shows renewed strength inside the zone. Blindly buying the fifth touch because a rectangle is still on the chart is poor risk-taking.
Basic Order Block Trading Plan
Define Higher-Timeframe Bias Before Looking for Entries
A simple order block trading plan starts with bias. Use the higher timeframe to decide whether you want long setups, short setups, or no trade. For intraday traders, that might mean using the 4-hour or daily chart for context, then dropping to the 15-minute or 5-minute chart for execution. Swing traders may use weekly and daily levels, then refine on the 4-hour.
Bias should come from structure, liquidity, and location. Are you trading from a premium or discount area? Has price swept liquidity? Is the broader trend still intact? A bullish block inside a higher-timeframe downtrend can work, but it is usually a countertrend idea. That changes targets and patience.
Markets also react differently by asset class. A forex pair near a major central bank event may ignore intraday zones. Crypto can respect a block beautifully during calm conditions, then violate it during liquidation cascades. For asset-specific context, the Bitcoin trading guide explains why volatility and session behavior matter.
Wait for Price to Return to a Valid Order Block
After bias and zone selection, patience does the heavy lifting. You want price to come back to the block, not chase away from it. Chasing creates poor reward-to-risk because invalidation is far away and late traders are vulnerable to the retracement they should have waited for.
A good return often has a controlled pullback into the zone. It may fill part of the inefficiency. It may raid a minor low or high just before entering. The best entries usually feel uncomfortable because price is moving against the original impulse during the retracement.
Do not force the setup. Some of the cleanest blocks never get revisited. Missing those trades is normal. Taking low-quality replacements because you want action is optional, and usually expensive.
Use Lower-Timeframe Confirmation for Entry, Stop, and Target
Lower-timeframe confirmation helps avoid blindly entering every touch. Inside a bullish higher-timeframe block, traders may look for a small liquidity sweep, a minor change of character, or a micro bullish block that forms after price reacts. Inside a bearish higher-timeframe block, they may look for a lower-timeframe high raid and a break lower.
Targets should be planned before entry. Common targets include opposing liquidity, prior highs or lows, the next imbalance, or a higher-timeframe supply or demand zone. A trade targeting a nearby level may not justify the risk. A beautiful block with no room to pay is still a pass.
For more execution models, the archive of SMC trading strategies is a better next step than adding more indicators to a messy chart.
Timeframes, Invalidation, and Risk Management
Higher-Timeframe Blocks Carry More Weight; Lower-Timeframe Blocks Add Precision
Higher-timeframe blocks tend to matter more because they represent broader order flow. A daily block will usually attract more attention than a 1-minute block. That does not mean the daily zone gives a better entry by itself. It may be too wide for practical risk.
The solution is top-down alignment. Use the higher timeframe for the main area and directional idea. Use the lower timeframe to refine the actual entry. This keeps the logic anchored while improving execution.
A common mistake is treating every lower-timeframe block as equal to a higher-timeframe zone. A 5-minute bullish block fighting a weekly bearish supply area needs a very different expectation. Context outranks precision.
Place Invalidation Beyond the Order Block Extreme
Invalidation belongs beyond the order block extreme because that is the price area that defines the premise. For a bullish block, that usually means below the low of the candle or refined zone. For a bearish block, it usually means above the high.
The stop should also account for spread, volatility, and the instrument’s normal behavior. A stop placed exactly one tick beyond the low of a volatile crypto wick may be technically logical but practically fragile. A forex pair during a liquid session may allow tighter execution, but news risk can still distort fills.
Position sizing matters more than the beauty of the zone. Decide what percentage or fixed amount you are willing to lose before entry. Then size the position around the invalidation distance. Never widen the stop after entry because the candle “still looks institutional.” That is emotion dressed as analysis.
Avoid Midpoint Stops When the Smart-Money Premise Requires Full Block Protection
Some traders use the 50% midpoint of the order block as an entry or stop reference. The midpoint can be useful for refinement, especially when the full candle is large. But using a midpoint stop while claiming the full block is valid creates a logic mismatch.
The market can trade through half the block and still respect the zone. That is common. A midpoint stop may remove you before the actual invalidation occurs. On the other hand, using the full block may create a stop so wide that the trade no longer offers acceptable reward-to-risk.
The answer is not to pretend one method is always superior. Choose the zone, define the invalidation, then size the trade properly. When the full block is too large, wait for lower-timeframe confirmation inside it or skip the setup. Skipping is a professional decision.
Order blocks fail in three main ways. First, price returns and slices through the zone with strong closes, meaning the original interest was consumed or reversed. Second, price reacts but cannot break away, creating a weak bounce into opposing order flow. Third, the broader market structure changes before entry, making the old block irrelevant. These failure cases are not exceptions. They are part of the model.
A typical failed bullish setup looks like this: price sweeps a low, rallies, breaks a minor high, and leaves behind a bullish block. Later, price returns to the zone, but the reaction is shallow. Sellers press again, price closes below the block low, and the next candle continues lower. At that point, the trade idea is invalid. The correct response is to accept the loss or avoid entry if confirmation never appeared.
FAQ
What is an order block in trading?
An order block in trading is an SMC zone formed by the final bullish or bearish candle area before an impulsive move that shifts market structure. Traders view it as a possible institutional footprint where large orders were executed before price moved aggressively.
How do you identify order blocks?
Start with market structure first. Find a strong expansion that creates a break of structure or change of character, then mark the last opposing candle before that move. Many traders use the candle body, while others use the full high-to-low range.
What is the difference between a bullish and bearish order block?
A bullish order block is typically the last down candle before an upside expansion, suggesting demand entered before price moved higher. A bearish order block is usually the last up candle before downside expansion, suggesting supply entered before price sold off aggressively.
Are order blocks the same as support and resistance?
No. Support and resistance are reaction zones usually based on repeated touches. Order blocks are tied to expansion, market structure shifts, and potential institutional execution. An order block may act like support or resistance, but its logic comes from the move it created.
Where should a stop loss go when trading an order block?
A common SMC approach places invalidation beyond the order block extreme, not at the midpoint. When price cleanly breaks through the block, the original smart-money premise may have failed. Stops should also account for volatility, spread, and position sizing.
The useful question is not whether an order block is “real.” The useful question is whether the zone launched a meaningful move, fits the structure, offers clean invalidation, and still has room to target liquidity. What do you require before you trust one on your own chart?
Educational content only. This is not financial advice, investment advice, or a recommendation to buy or sell any market. Trading involves risk, and you are responsible for your own decisions.