
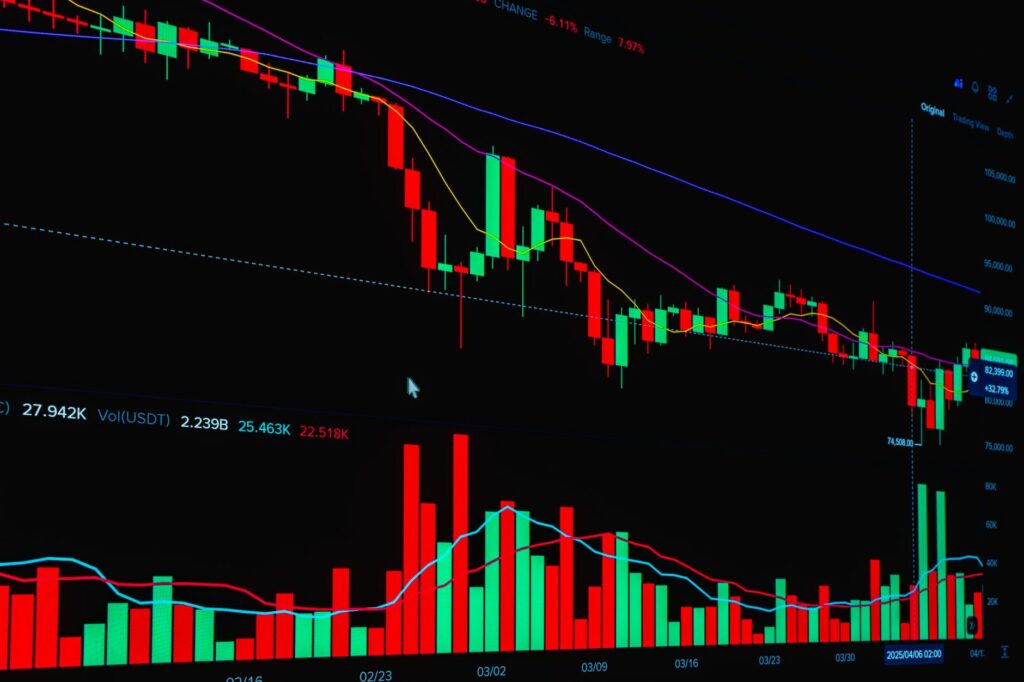
You mark a clean level, price taps it, and then it slices straight through your stop. That usually means you labeled a reaction area as an order block without proving the move that came from it. The practical question, what is an order block in trading, matters because the answer changes where you enter, where you’re wrong, and how much you risk.
An order block is the final opposing candle, or tight candle cluster, before an impulsive move that breaks market structure or shifts market character. In Smart Money Concepts, traders treat it as the origin area of aggressive buying or selling, then wait for price to return before planning execution.
For context, this concept sits inside Smart Money Concepts trading, where structure, liquidity, displacement, imbalance, and mitigation matter more than a single horizontal line. The language can sound mystical. I prefer to keep it mechanical. A block earns attention only after price leaves with intent and changes something meaningful on the chart.
Two numeric facts help ground the discussion. A FXEmpire market note cited Meta rising 12.5% while discussing a Nasdaq rally, which is a real example of directional expansion creating obvious origin zones on charts. A Moomoo market briefing dated September 17, 2026 covered pivot and long/short positioning signals across gold, crude oil, forex, and stock indices, a reminder that level-based analysis is used across multiple asset classes, not only crypto.
What Is an Order Block in Trading?
An order block is a price zone created by the last opposing candle, or a compact group of opposing candles, before a sharp directional move that breaks structure. In a bullish case, price trades down into a candle or cluster, then launches upward with enough strength to take out a prior swing high. In a bearish case, price trades up into a candle or cluster, then sells off hard enough to break a prior swing low.
The key phrase is breaks structure. Without that, the zone is only a reaction point. Maybe useful. Maybe not. But it has not proven itself as an order block under the stricter SMC definition.
Definition: final opposing candle before displacement
The classic SMC definition is simple: the order block is the final candle of the opposite color before the move that creates displacement and breaks structure.
- Bullish setup: the last bearish candle before a strong bullish impulse.
- Bearish setup: the last bullish candle before a strong bearish impulse.
- Cluster version: two or three tight candles that form the origin of the expansion.
I don’t treat every tiny candle before a move as valid. The origin must be connected to a meaningful leg. A five-minute bounce in the middle of noise is not the same thing as a higher-timeframe expansion that clears liquidity, leaves imbalance, and shifts structure.
Bullish and bearish order blocks in plain chart terms
A bullish order block commonly forms when sellers push price lower, often into a low or discount area, and then aggressive buying takes over. The final down candle becomes the zone traders watch for a return. When price comes back, the theory is that unfilled institutional demand may still exist there, or at least that other SMC traders will defend the level.
A bearish block works in reverse. Buyers push price higher, often into a premium area or above a prior high, then sellers hit the market with force. The last up candle before the drop becomes the reference point. Traders then monitor a return into that zone for short opportunities.
On crypto, forex, index futures, and commodities, the visual logic is the same. A Bitcoin block on a four-hour chart and a EUR/USD block on a one-hour chart can be read with the same framework. The difference is volatility, spread, session behavior, and how cleanly the instrument respects structure.
Why a valid block is not simply any demand or supply zone
Demand and supply zones are broad categories. A demand zone says buyers previously responded. A supply zone says sellers previously responded. An order block has a tighter standard: it should be the origin point of a move that changed market structure.
This distinction matters because hindsight can make any chart look clean. Price bounces, traders draw a rectangle, and the rectangle gets a fancy label. That is weak analysis. A real smart money order block should have a before-and-after story: liquidity was attacked, price expanded, structure changed, and the market later returned to test the origin.
My opinion is blunt: most order blocks posted online are just dressed-up support and resistance. They may work sometimes, but the labeling is sloppy. Sloppy labeling leads to oversized zones, late entries, and stops placed where the trade idea was already invalid.
Why Do Order Blocks Matter in SMC?
Order blocks matter because they connect three parts of the SMC framework: liquidity, institutional activity, and structure. The block is not valuable by itself. It becomes valuable when it marks the area where a meaningful repricing began.
In order block trading, the goal is not to predict every turn. The goal is to identify where the market previously showed decisive intent, then wait for price to revisit that area under controlled conditions. That waiting part is where most traders fail. They see the level, enter early, and ignore whether the return is clean or messy.
Institutional origin candles and the idea behind them
SMC traders often describe order blocks as institutional origin candles. The logic is that large players cannot always fill full positions at one price. They may initiate a move, leave behind unfilled interest, and later allow price to return to that zone for mitigation.
Whether you believe every detail of that story is less important than reading the chart mechanics correctly. Large participation tends to leave evidence. You see range expansion, decisive closes, trapped traders, and often a price gap or imbalance. Retail enthusiasm alone rarely creates the cleanest structural breaks across liquid markets.
After years of watching crypto and forex charts, my practical observation is this: the best blocks are usually obvious before the retest. They don’t need twenty annotations. The market leaves the area fast, takes a structural level, and creates a clean pocket of inefficiency that traders can plan around.
The liquidity story behind the move
Liquidity is the fuel. Before a major directional leg, price often raids a prior high, sweeps a low, or pushes into an obvious pool of stops. That stop-run provides orders that can be used to build or exit large positions. Then price reverses aggressively, creating the leg that points back to the block.
A common bullish sequence looks like this: price trades below an old swing low, triggers sell stops, fails to continue lower, then rallies hard through a recent swing high. The last bearish candle before that rally becomes the bullish block. For a deeper breakdown of that stop-run mechanic, see this guide to a liquidity sweep in trading.
The bearish version is the mirror image. Price runs above an old high, draws in breakout buyers, fails, then drops through a swing low. The last bullish candle before the selloff becomes the bearish reference zone.
Order block vs support resistance
The phrase order block vs support resistance causes confusion because both can appear at the same location. A prior support level can become the area where a bullish block forms. A resistance shelf can overlap with a bearish block. The difference is the reason for the level.
Support and resistance focus on repeated reactions. Price bounced there before, rejected there before, or consolidated there before. An SMC block focuses on the origin of a structural move. It asks: where did the displacement begin, and what did that move break?
- Support and resistance: broad historical reaction areas.
- Order block: specific candle or cluster that started a structural leg.
- Best overlap: a block that also sits at a higher-timeframe level, in premium or discount, after a liquidity grab.
That overlap is powerful, but it still needs risk control. No zone is sacred.
How Do You Identify Order Blocks Step by Step?
Good order block analysis starts before the rectangle. I want structure first, then displacement, then the origin. Drawing zones first is how traders convince themselves that every candle is institutional.
Mark market structure before hunting zones
Start with the swing map. Identify the current trend, the major swing highs and lows, and whether price is making higher highs, higher lows, lower highs, or lower lows. Then mark the point where structure actually breaks.
A break of structure means price closes beyond a meaningful prior swing in the direction of the prevailing move. A change of character means price violates recent structure against the prior trend, suggesting control may have shifted. These concepts are related, but they don’t serve the same purpose. A break confirms continuation. A character shift often warns of reversal or transition.
On a bullish chart, a valid leg should take out a prior swing high with authority. On a bearish chart, the leg should break a swing low. Wicks alone can be useful, but closes carry more weight because they show acceptance beyond the level.
Trace the impulsive leg back to its origin
Once the structural break is marked, follow the impulse backward. Find the last opposing candle before the move began. That candle is your first candidate.
For a bullish block, look for the final down candle before strong upside delivery. For a bearish block, look for the final up candle before strong downside delivery. A tight cluster is acceptable when the origin is not a single clean candle, but I avoid huge multi-candle ranges. Wide zones destroy reward-to-risk unless the chart offers a clean refinement.
The question how to identify order blocks is really a filtering question. Many candles can be labeled. Fewer deserve capital. I want the candidate to be attached to a move that removed liquidity, displaced cleanly, and broke a structural point traders could see in real time.
Refining the zone for cleaner execution
After locating the origin candle, refine the area. Traders usually choose one of three approaches.
- Full candle range: use the high and low of the origin candle. This is wider, but more forgiving.
- Candle body: use the open and close. This gives tighter entries, but may miss trades.
- Wick refinement: focus on the wick or internal portion that aligns with premium, discount, or a lower-timeframe block.
Premium and discount matter. In a bullish environment, I prefer buying blocks in discount, below the midpoint of the dealing range. In a bearish environment, I prefer selling blocks in premium. This keeps the trade aligned with value rather than chasing the move where late participants are already trapped.
Then wait for mitigation. Mitigation is simply price returning to the origin area after the displacement. The return should not be a violent grind through the zone. A clean approach into the level, especially after liquidity has been taken, is easier to plan than a choppy mess that has already consumed the block several times.
What Validates a Smart Money Order Block?
A smart money order block is validated by what price does after leaving it. The candle itself is not magic. The aftermath matters.
Displacement with speed, range, and commitment
Displacement is the market moving away from the block with force. I want to see large bodies, decisive closes, little hesitation, and distance from the origin. The move should look different from the previous candles. Small overlapping candles are a warning sign because they suggest a lack of urgency.
Range expansion is especially important in slower markets. A block that creates the largest candle sequence of the session deserves more respect than one that produces a weak bounce. Strong expansion tells you the market repriced, and repricing is the whole point of the setup.
Structure break or character shift as proof
A block gains credibility when the move away from it breaks a swing level. Without that break, the trade rests on hope. A bullish candidate should lead to a break above a prior high or a meaningful short-term change of character. A bearish candidate should lead to a break below a prior low.
This is where order block SMC differs from casual zone trading. The framework demands evidence. A candle becomes important because the market used it as the launch point for a structural event.
For example, a typical bullish scenario might begin with price sweeping a low, forming a down candle, then rallying through the most recent lower high. The down candle becomes the candidate. The break validates the idea. The later return creates the trade location.
Imbalance, fair value gap, and the quality of the return
Many strong moves leave a price inefficiency, often called a fair value gap. That gap shows that price moved so quickly that one side of the market did not trade evenly through the range. It is not required for every setup, but it improves the story when combined with a clean structural break. You can study that idea in more detail in this guide to fair value gaps.
The return to the block matters as much as the departure. A clean retracement into the zone is healthier than a slow, overlapping crawl that repeatedly taps the area. Excessive chopping can mean the original orders have been absorbed or that the market is preparing to run through the level.
Here is the failure case that traders need to respect. Price leaves a candle, breaks a minor structure point, then drifts back immediately with no meaningful imbalance and no liquidity context. Traders buy the “bullish block,” but the broader trend is bearish and the return is heavy. The zone pauses price for a moment, then fails. That was never a high-quality block. It was a weak reaction dressed in SMC language.
How Do Traders Enter Order Block Setups?
There are several ways to enter from a block. The right model depends on personality, time frame, spread, volatility, and whether the trader can watch the chart live. The setup should be chosen before price reaches the zone.
Aggressive limit entry at the block
The aggressive model uses a limit order at the selected portion of the block. A bullish trader might place a buy limit at the body midpoint or open of the origin candle. A bearish trader might place a sell limit at the body or upper portion of the candle.
The advantage is price. A limit order can catch the best entry before confirmation appears. The cost is uncertainty. Price may tag the level and continue straight through it. That is why the invalidation point must be clear before the order is placed.
This model works best when the higher-timeframe context is strong, the block is clean, and the trader accepts that some entries will fail without any lower-timeframe warning.
Confirmation entry after lower-timeframe shift
The confirmation model waits for price to enter the zone and then show a lower-timeframe shift. A bullish trader watches for a sweep of a minor low inside the block, followed by a break of a lower-timeframe high. A bearish trader watches for a minor high to be raided, followed by a break lower.
The advantage is evidence. You see buyers or sellers react before entering. The trade-off is worse price and sometimes a missed move. That is acceptable. Missing a trade is not damage. Forcing one is.
Confirmation is especially useful when the higher-timeframe block is wide. Instead of placing a stop beyond a massive zone, the trader can drop to a lower chart and use a smaller internal structure for execution.
Hybrid entry with controlled scaling
The hybrid model takes a small starter position at the block and adds only after confirmation. This can make sense when the level is strong but the trader still wants evidence before full exposure.
The danger is emotional scaling. Adding because price moved against the first entry is not a hybrid model. That is averaging into uncertainty. A proper add-on happens after the lower-timeframe chart confirms the reaction, and total risk across both positions remains within the original risk plan.
For traders building playbooks, I’d rather see three clean order block setups documented in detail than fifty random screenshots. The process should include context, liquidity, structural break, zone refinement, entry trigger, invalidation, and post-trade review. You can browse more examples of structured setups in the SMC trading strategies section.
Where Is an Order Block Invalidated and How Is Risk Managed?
Invalidation is the point where the trade idea is wrong. It is not the point where the trader feels uncomfortable. That distinction saves accounts.
Bullish and bearish invalidation points
A bullish block is usually invalidated by a decisive break below the low of the block. A bearish block is usually invalidated by a decisive break above the high of the block. Some traders require a close beyond the zone. Others use a wick through the extreme. The choice should match the time frame and instrument.
Crypto can wick aggressively. Forex pairs can raid levels during session transitions. Index futures may sweep both sides before choosing direction. Because of that, I prefer stops beyond the true invalidation point rather than exactly on the obvious edge where everyone else is clustered.
Decisive matters. A tiny wick through the level followed by immediate reclaim can be a stop-run. A strong close beyond the block, followed by acceptance outside it, usually means the idea failed.
Position size comes from stop distance, not conviction
Risk is calculated from the distance between entry and invalidation. A tighter stop allows larger size. A wider stop requires smaller size. Conviction should not override math.
For example, assume a trader risks 1% of account equity on a setup. The stop distance determines the position size so that a full loss equals that planned 1%. The trader does not increase size because the block “looks perfect.” Perfect-looking zones fail all the time.
- Define the block.
- Define invalidation.
- Size from the stop.
- Accept the outcome.
That sequence is boring, and that is exactly why it works as a risk process. The edge in order block trading comes from repeatable execution, not from worshiping a rectangle.
Higher-timeframe bias and lower-timeframe execution
Higher-timeframe blocks provide directional weight. Lower-timeframe blocks provide precision. A daily bullish block can tell you where value may exist. A fifteen-minute structure shift inside that zone can provide the actual trigger.
The cleanest model is top-down. Start with the higher-timeframe trend and dealing range. Mark important liquidity. Identify the block that caused structural displacement. Then move lower for execution only after price returns to the area.
For crypto traders, this matters even more because volatility can punish loose execution. A higher-timeframe Bitcoin block may be valid while a lower-timeframe entry still fails due to a local liquidity raid. For broader market context around crypto execution, see this guide on how to trade Bitcoin.
The failure mode is also clear. Traders find a beautiful five-minute bullish block while the four-hour chart is bearish, price is in premium, and a major sell-side liquidity target sits below. The small block may bounce, but the larger flow can overwhelm it. Lower-timeframe precision cannot fix higher-timeframe conflict.
FAQ
What is an order block in trading?
An order block is the final opposing candle, or tight candle cluster, before an impulsive move that breaks structure or shifts market character. In SMC, traders view it as the origin of institutional-style buying or selling, not just any random supply or demand zone.
What is the difference between bullish and bearish order blocks?
A bullish order block is commonly the last bearish candle before a strong rally. A bearish order block is commonly the last bullish candle before a strong selloff. The key is what happens next: displacement, a structure break, and evidence that price left the area with urgency.
How do you identify order blocks without hindsight bias?
Start with market structure, then find the impulsive leg that caused a break of structure or change of character. Trace that leg back to its origin candle, refine the zone with the body or wick, and wait for price to return before planning a trade.
How is an order block different from support and resistance?
Support and resistance are broad areas where price has reacted repeatedly. An SMC order block is more specific: the origin candle of a structural displacement. A level can overlap both concepts, but an order block needs a clear impulse, liquidity context, and validation rules.
When is an order block invalidated?
A bullish order block is usually invalidated when price decisively breaks below the block low. A bearish block is usually invalidated by a decisive break above the block high. Stops should sit beyond that invalidation point, with position size based on the planned risk.
The forward-looking takeaway is simple: the next time price reacts from a level, don’t rush to call it an order block. Ask what structure it broke, what liquidity it used, how cleanly it left, and where the idea is wrong. That answer is where better trade planning starts.
Educational content only. This is not financial advice, investment advice, or a recommendation to buy or sell any market.